Creating and setting up your account
Overview
This article shows you how to create your Kyvento account, confirm your email address and configure the most important personal settings — from your profile to sign-in security.
Register an account
Registration takes place at app.kyvento.com/register. Besides your company name, country, your own name and the sign-in email address, you set a password of at least 12 characters.
Two checkboxes are mandatory, and they are deliberately separate:
- the acceptance of the terms and conditions and the data processing agreement — an acceptance of contractual texts. The data processing agreement belongs here because Kyvento processes your own customers' data on your behalf (Art. 28 GDPR).
- the business confirmation ("I am acting as an entrepreneur within the meaning of § 14 BGB … and not as a consumer.") — a statement about yourself. Kyvento is aimed exclusively at businesses.
Without both checkboxes, "Create account" stays inactive; the server also rejects a registration without them. The privacy policy appears as a note with a link, never as a checkbox — it is information, not an agreement.
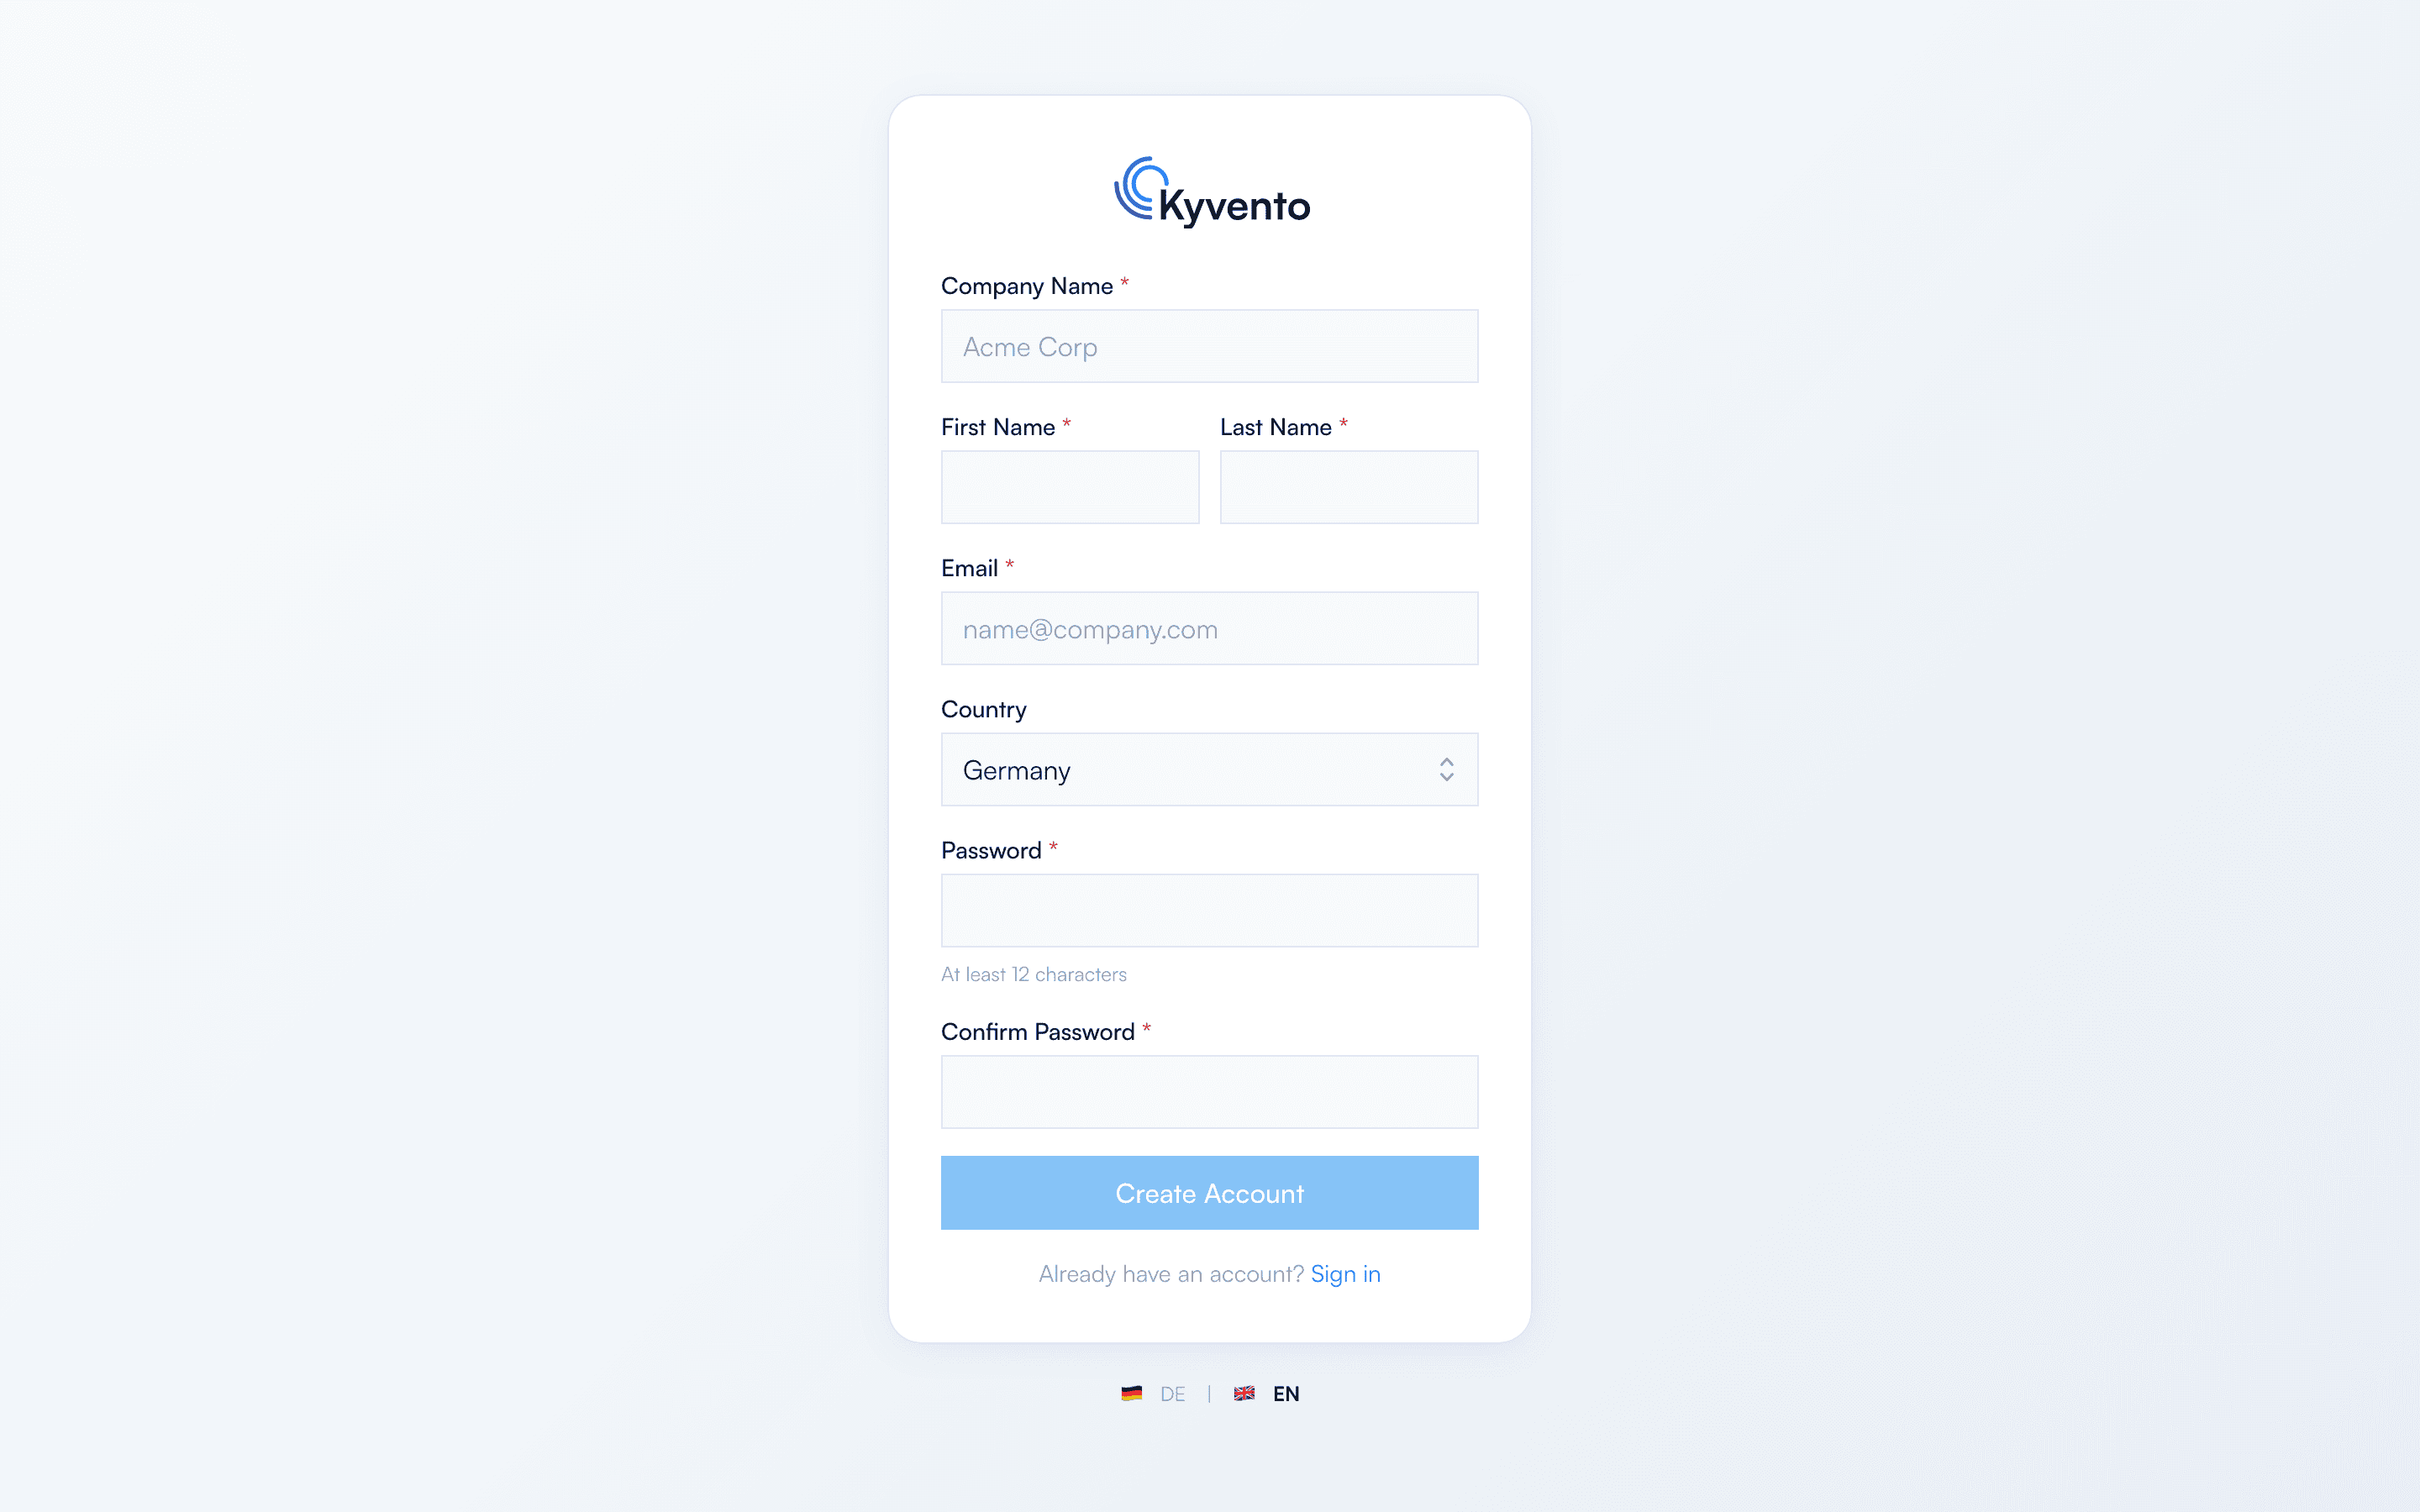
The person who registers the account automatically becomes the account owner with full rights. Ownership can be transferred later if needed.
Your legal documents in the account
Under Settings → "Legal" you can see at any time which versions your account has accepted – with the date and each document retrievable – alongside the versions currently in force. Every document carries its own version number: if only the data processing agreement is reissued, the terms do not appear to move with it.
The record is kept in the language in which the declarations were shown at registration, and its wording is not translated after the fact – it is the evidence.
The same area offers a text module for your own privacy policy to download. Your customers must be informed that you use Kyvento as a processor; you can adopt the section unchanged.
Confirm your email address
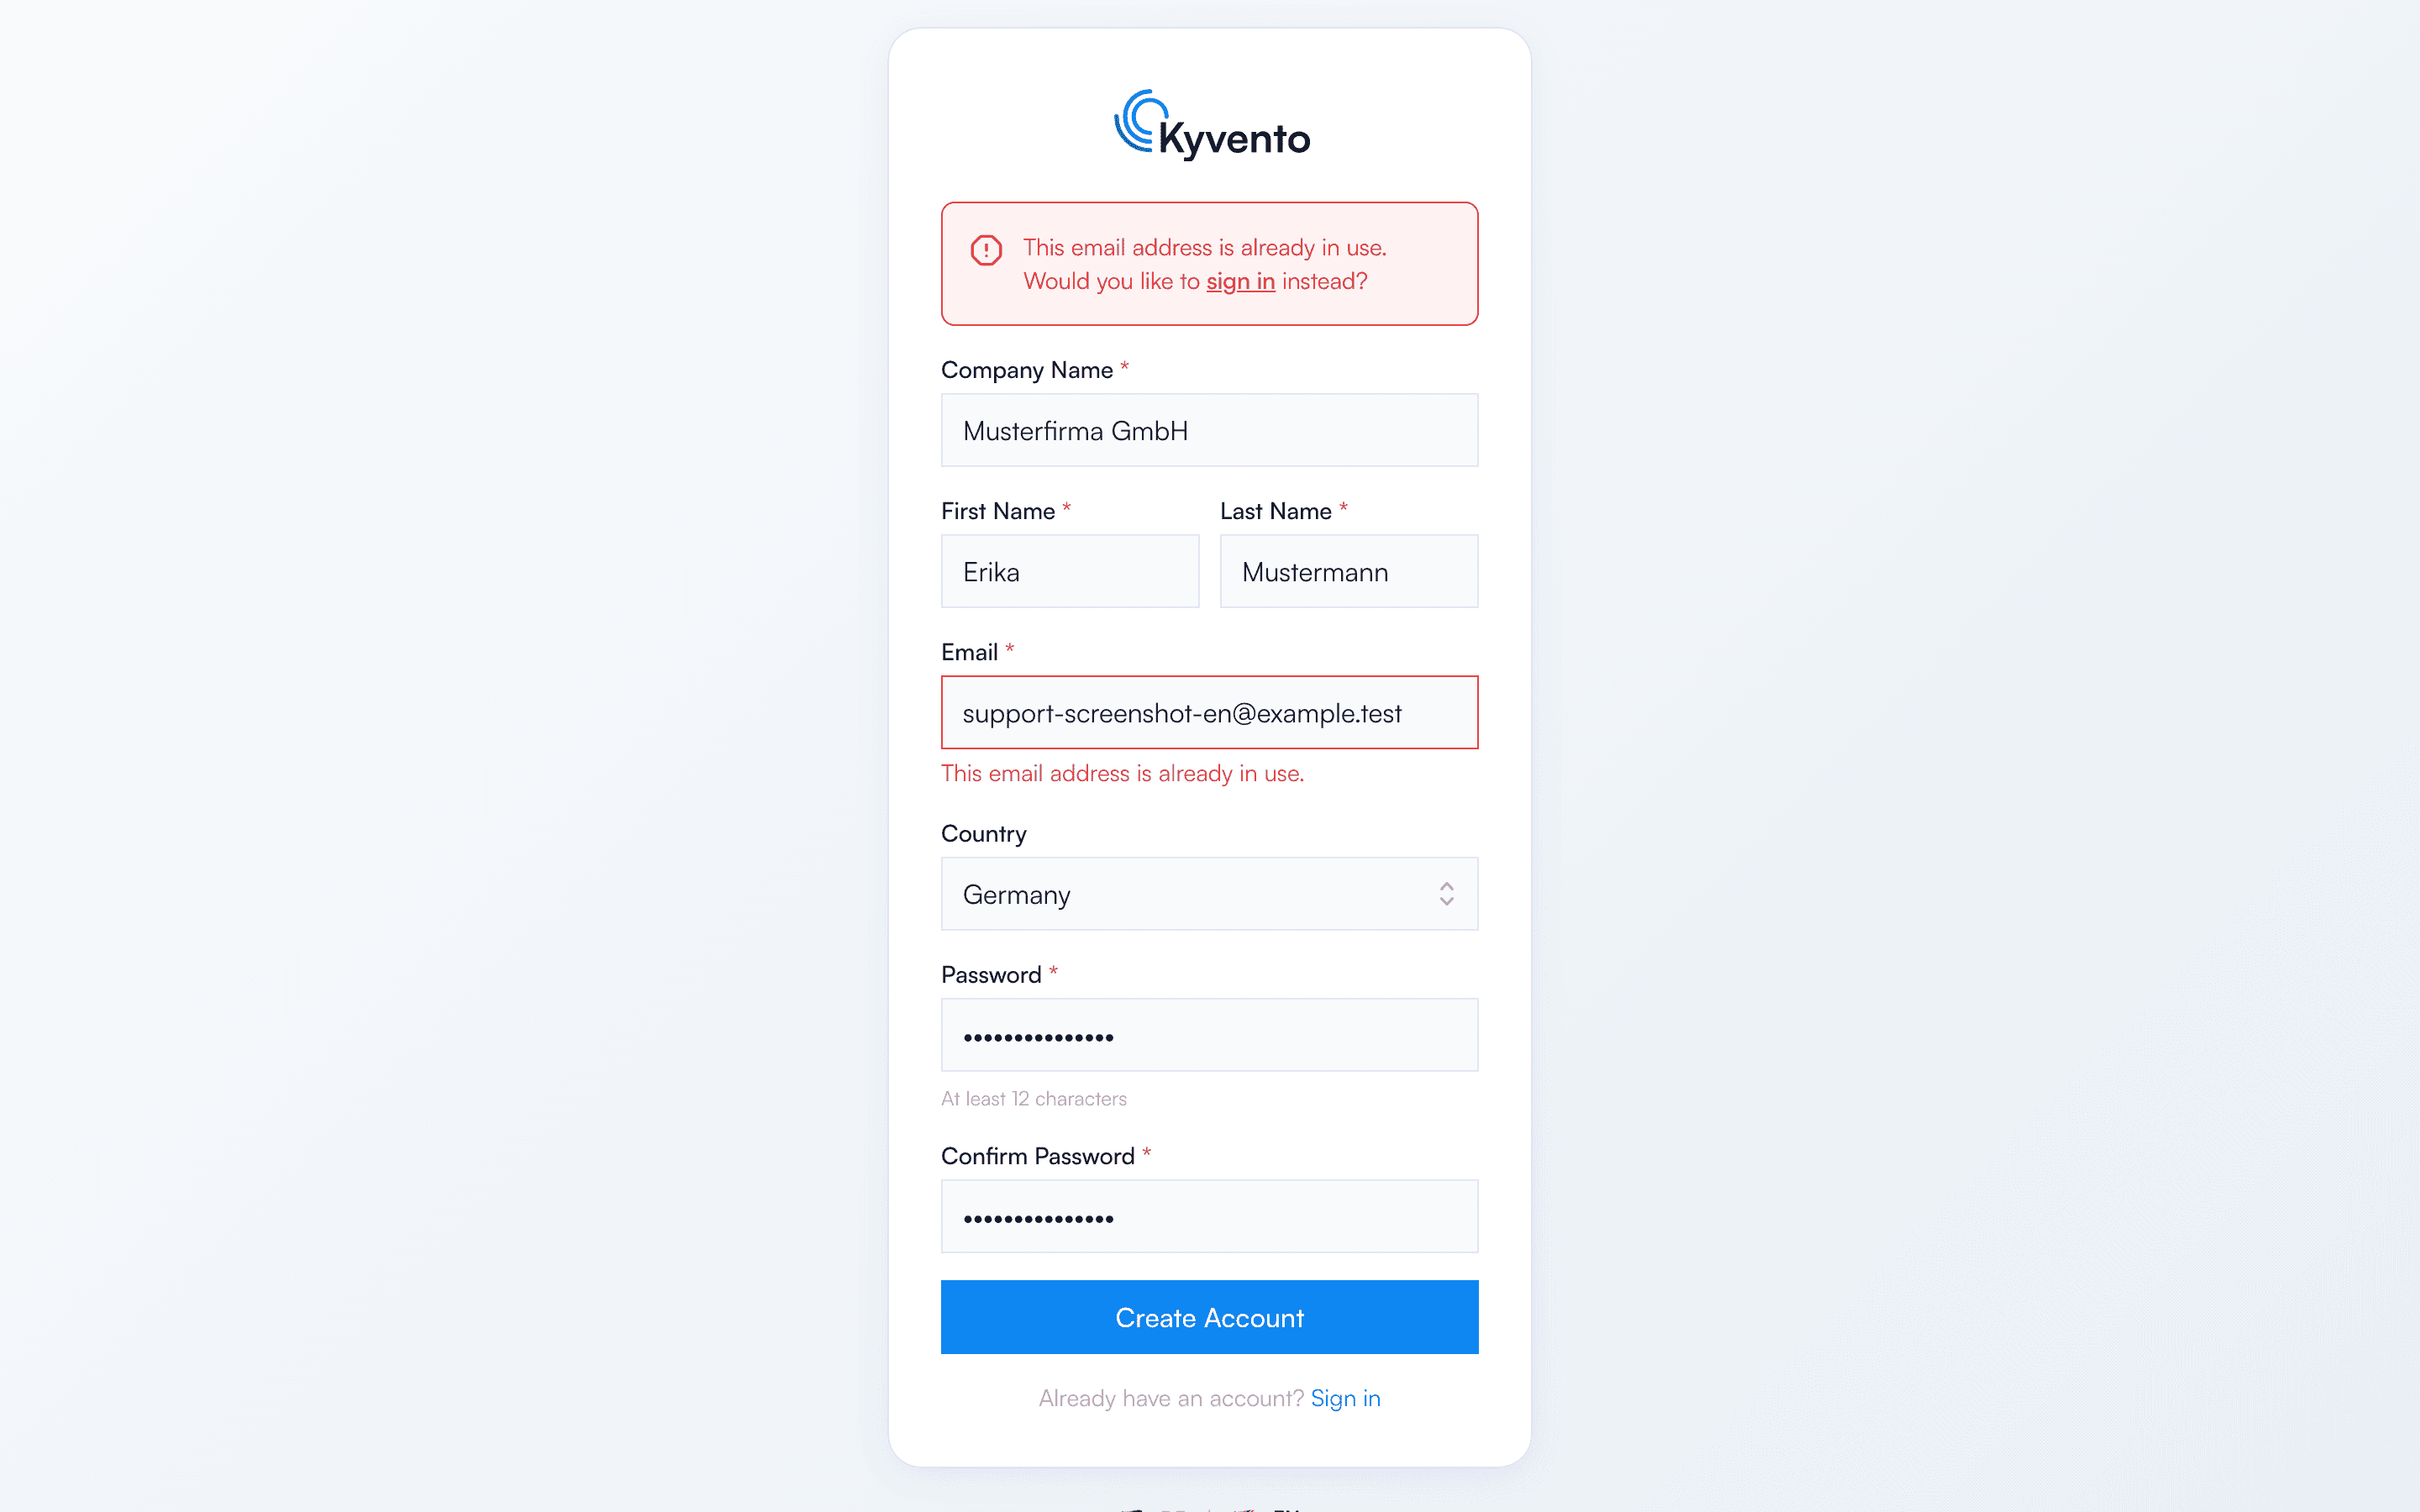
After registration we'll send you a confirmation email. You can only sign in once you've clicked the confirmation link. Use the "Resend confirmation email" button to request a new email if needed — for security reasons no more than once every two minutes.
First login and setup
After your first login, the dashboard greets you with a welcome dialog ("Welcome to Kyvento!") and the buttons "Set up later" and "Start setup". Only "Start setup" opens the setup wizard, which guides you through company details, settings and plan selection. You'll find the details in the Welcome to Kyvento: quick-start guide.
Adjust your personal profile
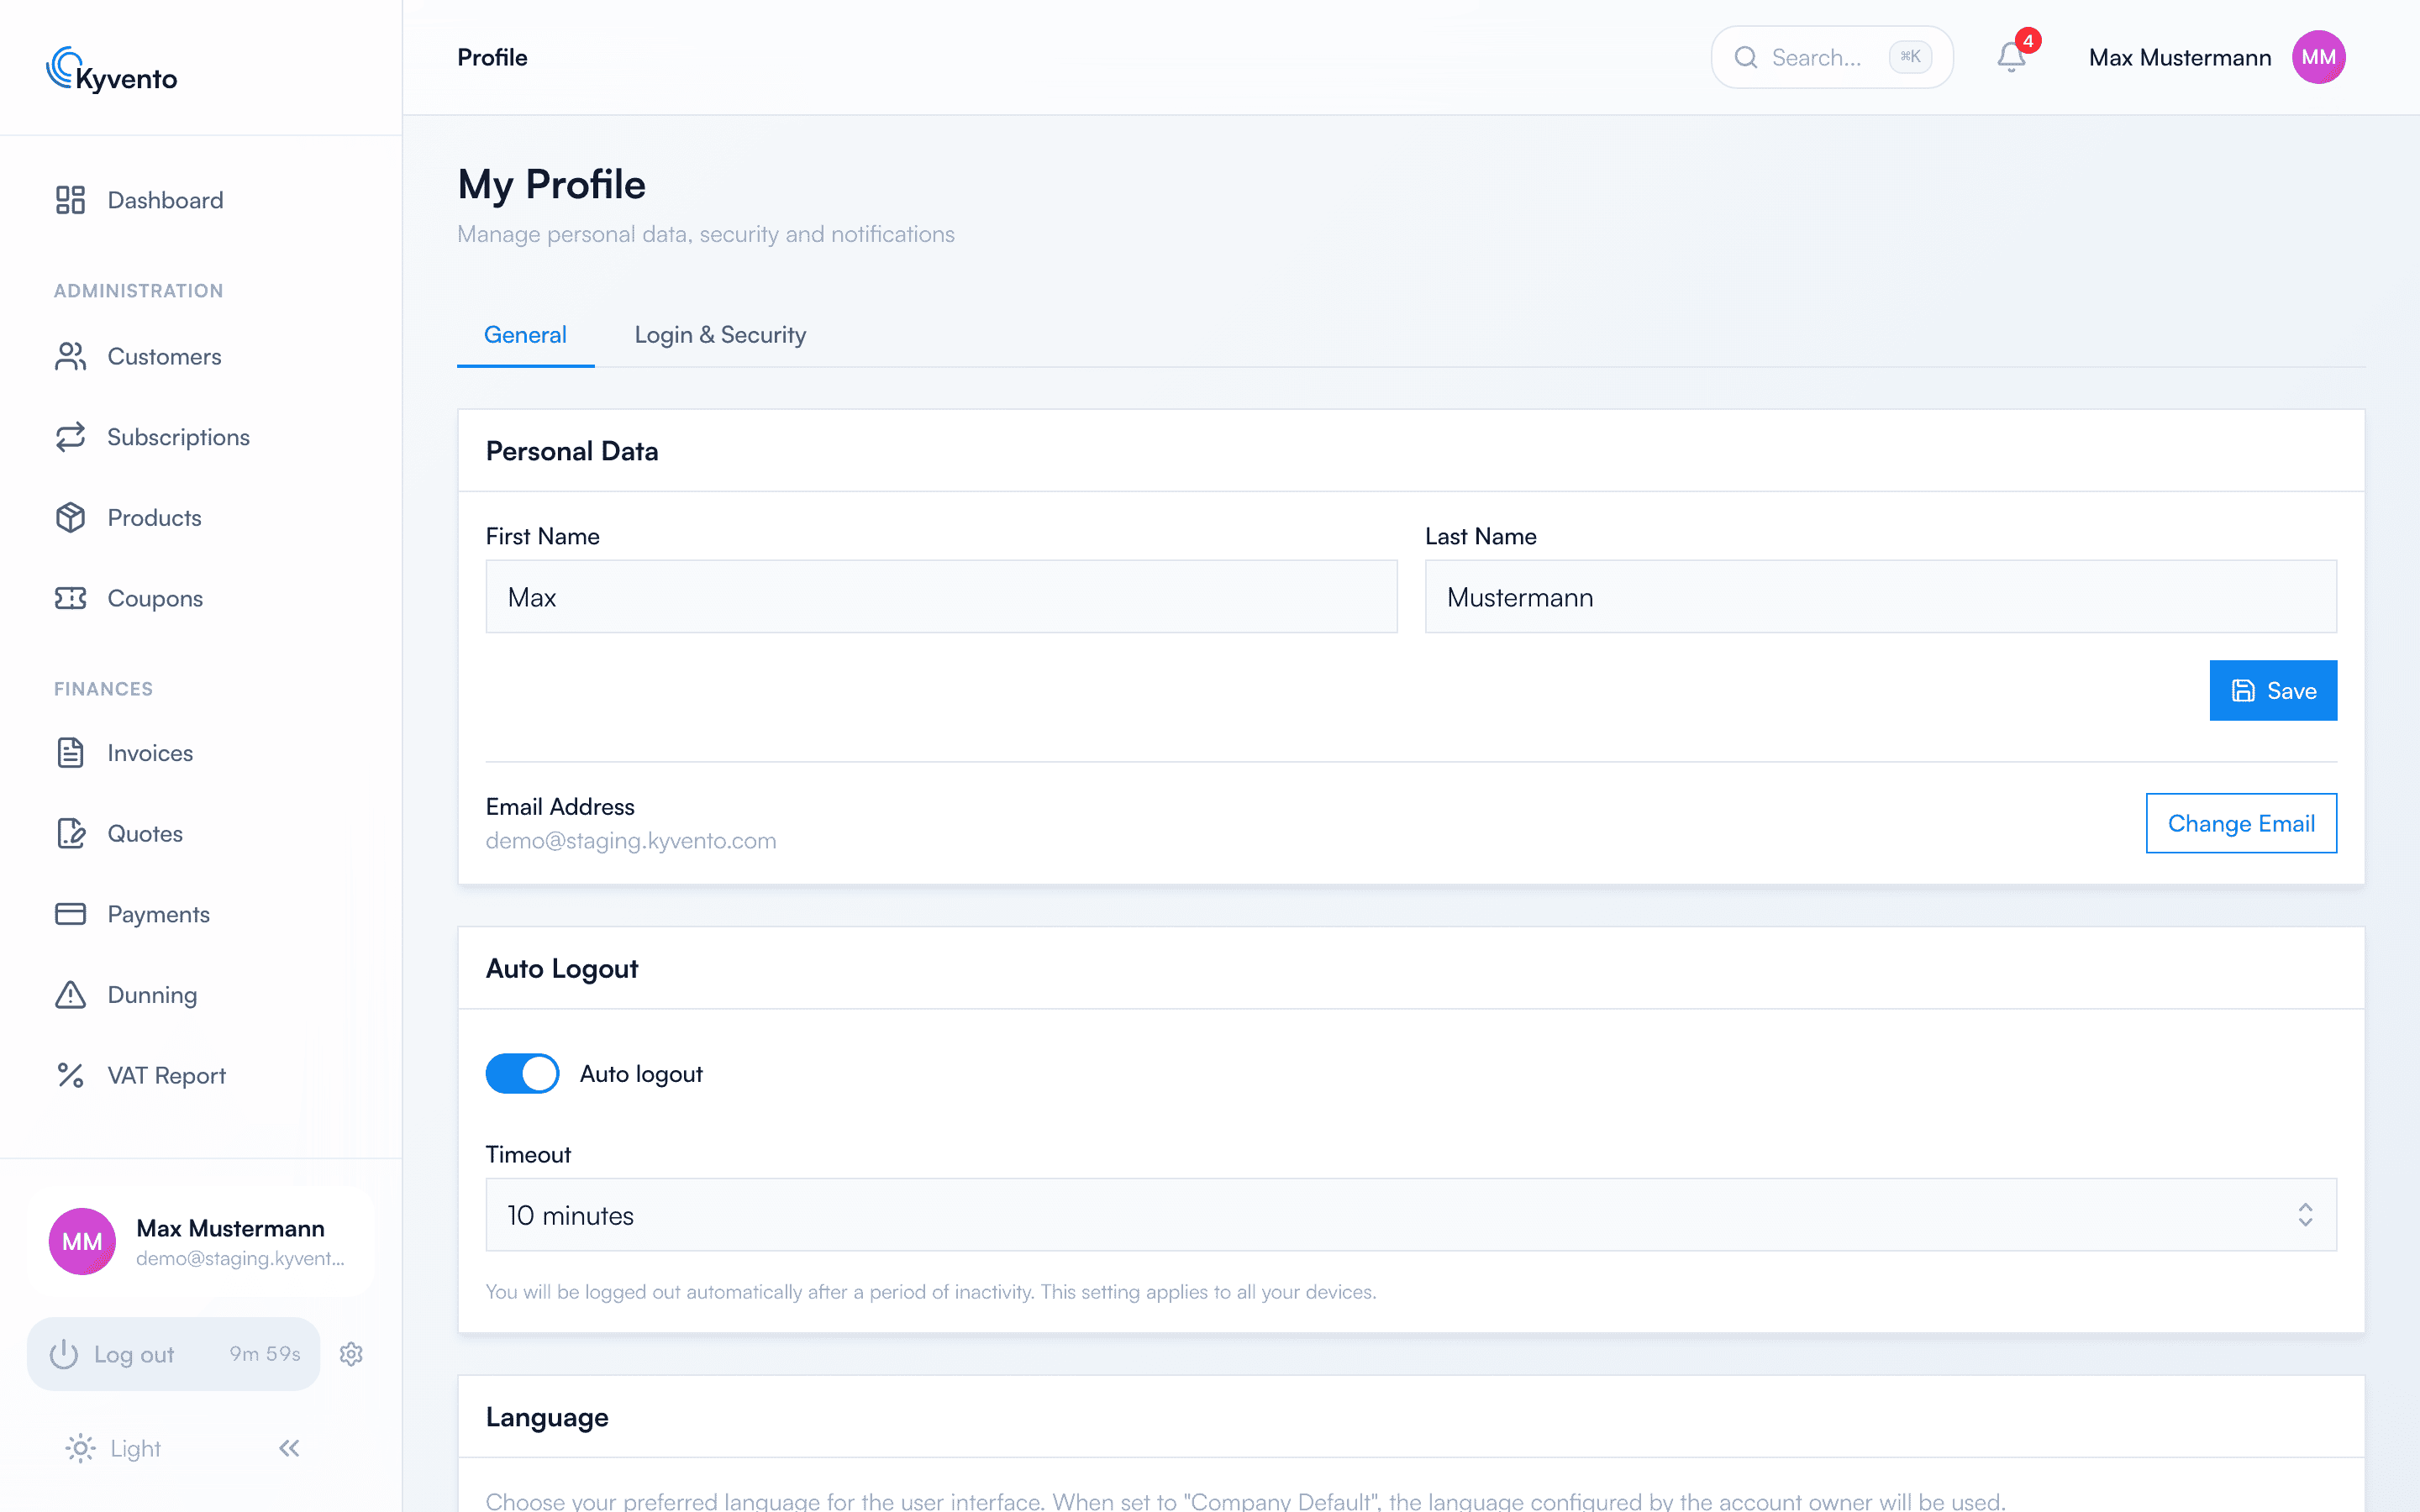
You reach your personal settings via the user area in the sidebar under "My profile". In the "General" tab you maintain your name and your email address — a change of address is confirmed by verification email. Alongside that you set after how long you are signed out automatically and in which language you want to see the interface.
Password and sign-in security
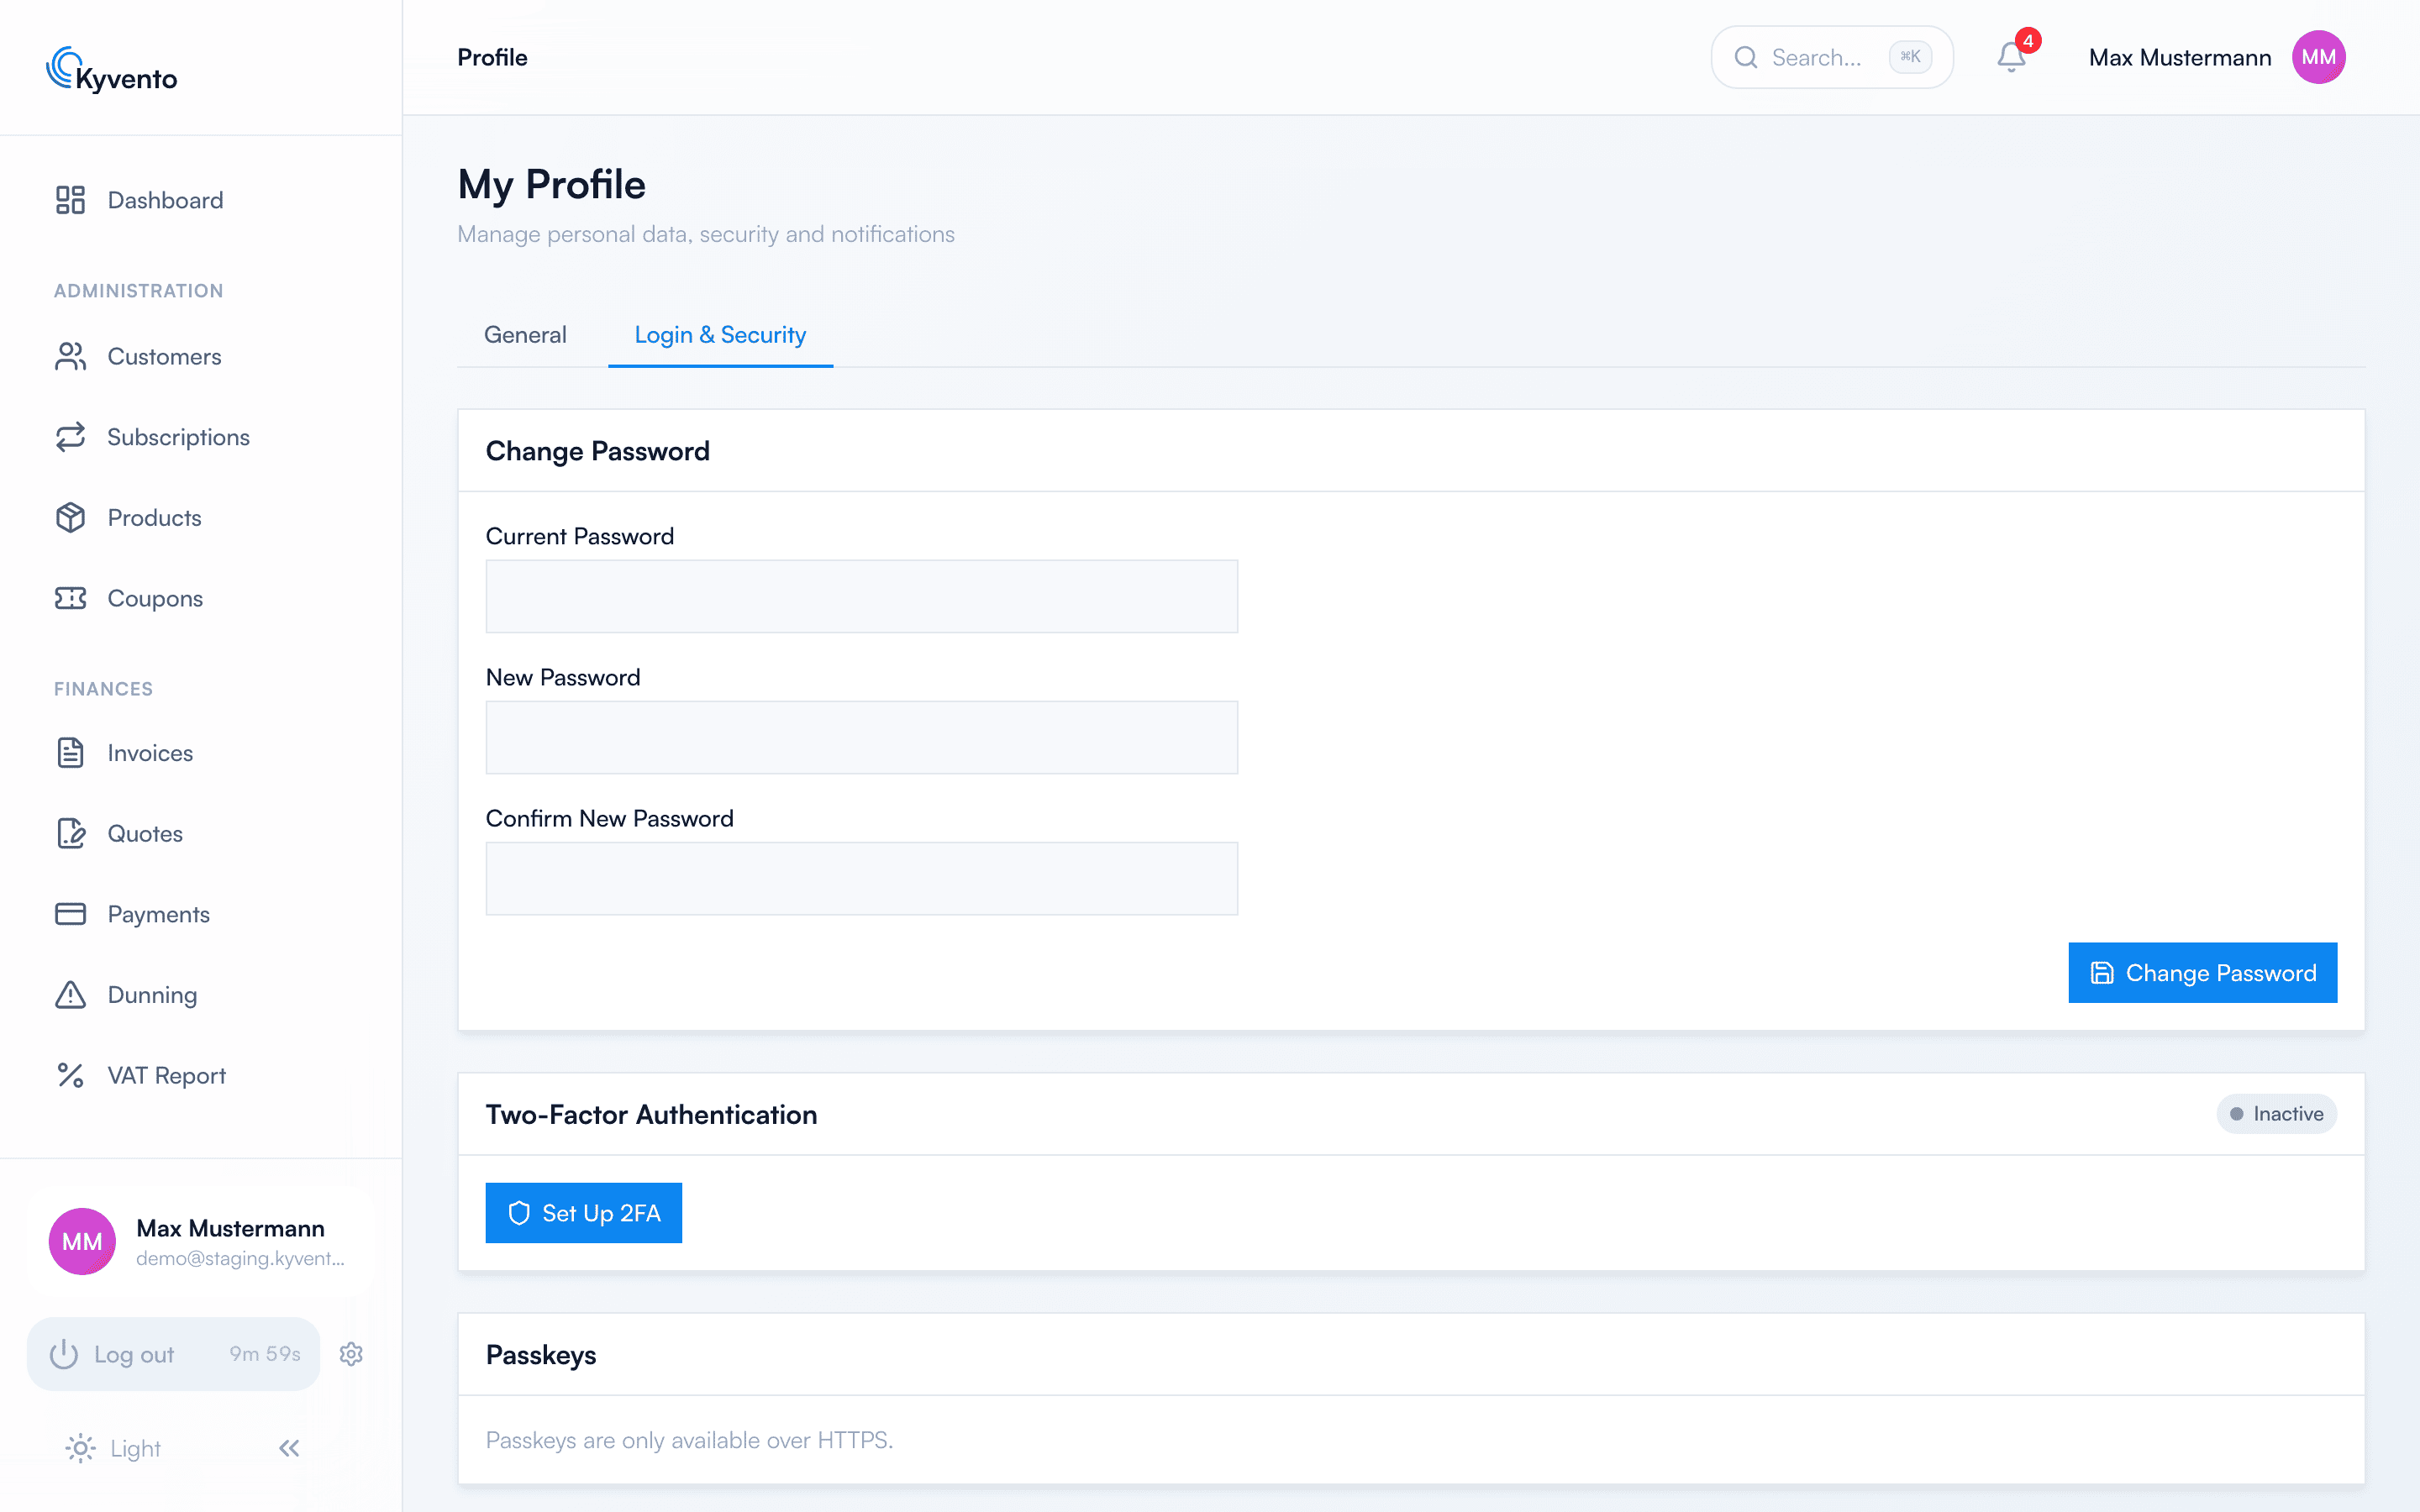
In the "Sign-in & security" tab you change your password. New passwords need at least 12 characters by default, with upper and lower case letters, a digit and a special character; this policy is configurable per account. At registration itself, Kyvento only checks the minimum length of 12 characters — the stricter rules apply from the first password change onwards.
In the same tab you set up two-factor authentication and passkeys and see your active sessions. We recommend enabling two-factor authentication right after setup; the instructions are in Enabling two-factor authentication.
Only the account owner additionally finds "Transfer ownership" here.
Next steps
- Store your company details — see Maintaining company and tax information
- Invite colleagues — see Inviting team members and managing permissions