Optimizing the checkout flow
Overview
Every unnecessary click in the checkout costs conversions. This article shows the five steps of the Kyvento checkout from the customer's perspective and the levers that improve your conversion rate – including the one that breaks more than it gains.
The five steps from the customer's perspective
- Product – product details, quantity, coupon entry; alongside it, the price summary with net, VAT and total per billing interval throughout.
- Details – customer type, email, name, address.
- Payment – a choice from the payment methods you have enabled.
- Order review – all details at a glance, the legal consents, and the legally compliant order button (Section 312j BGB).
- Confirmation – the success page; if configured, Kyvento additionally redirects to your own target URL.
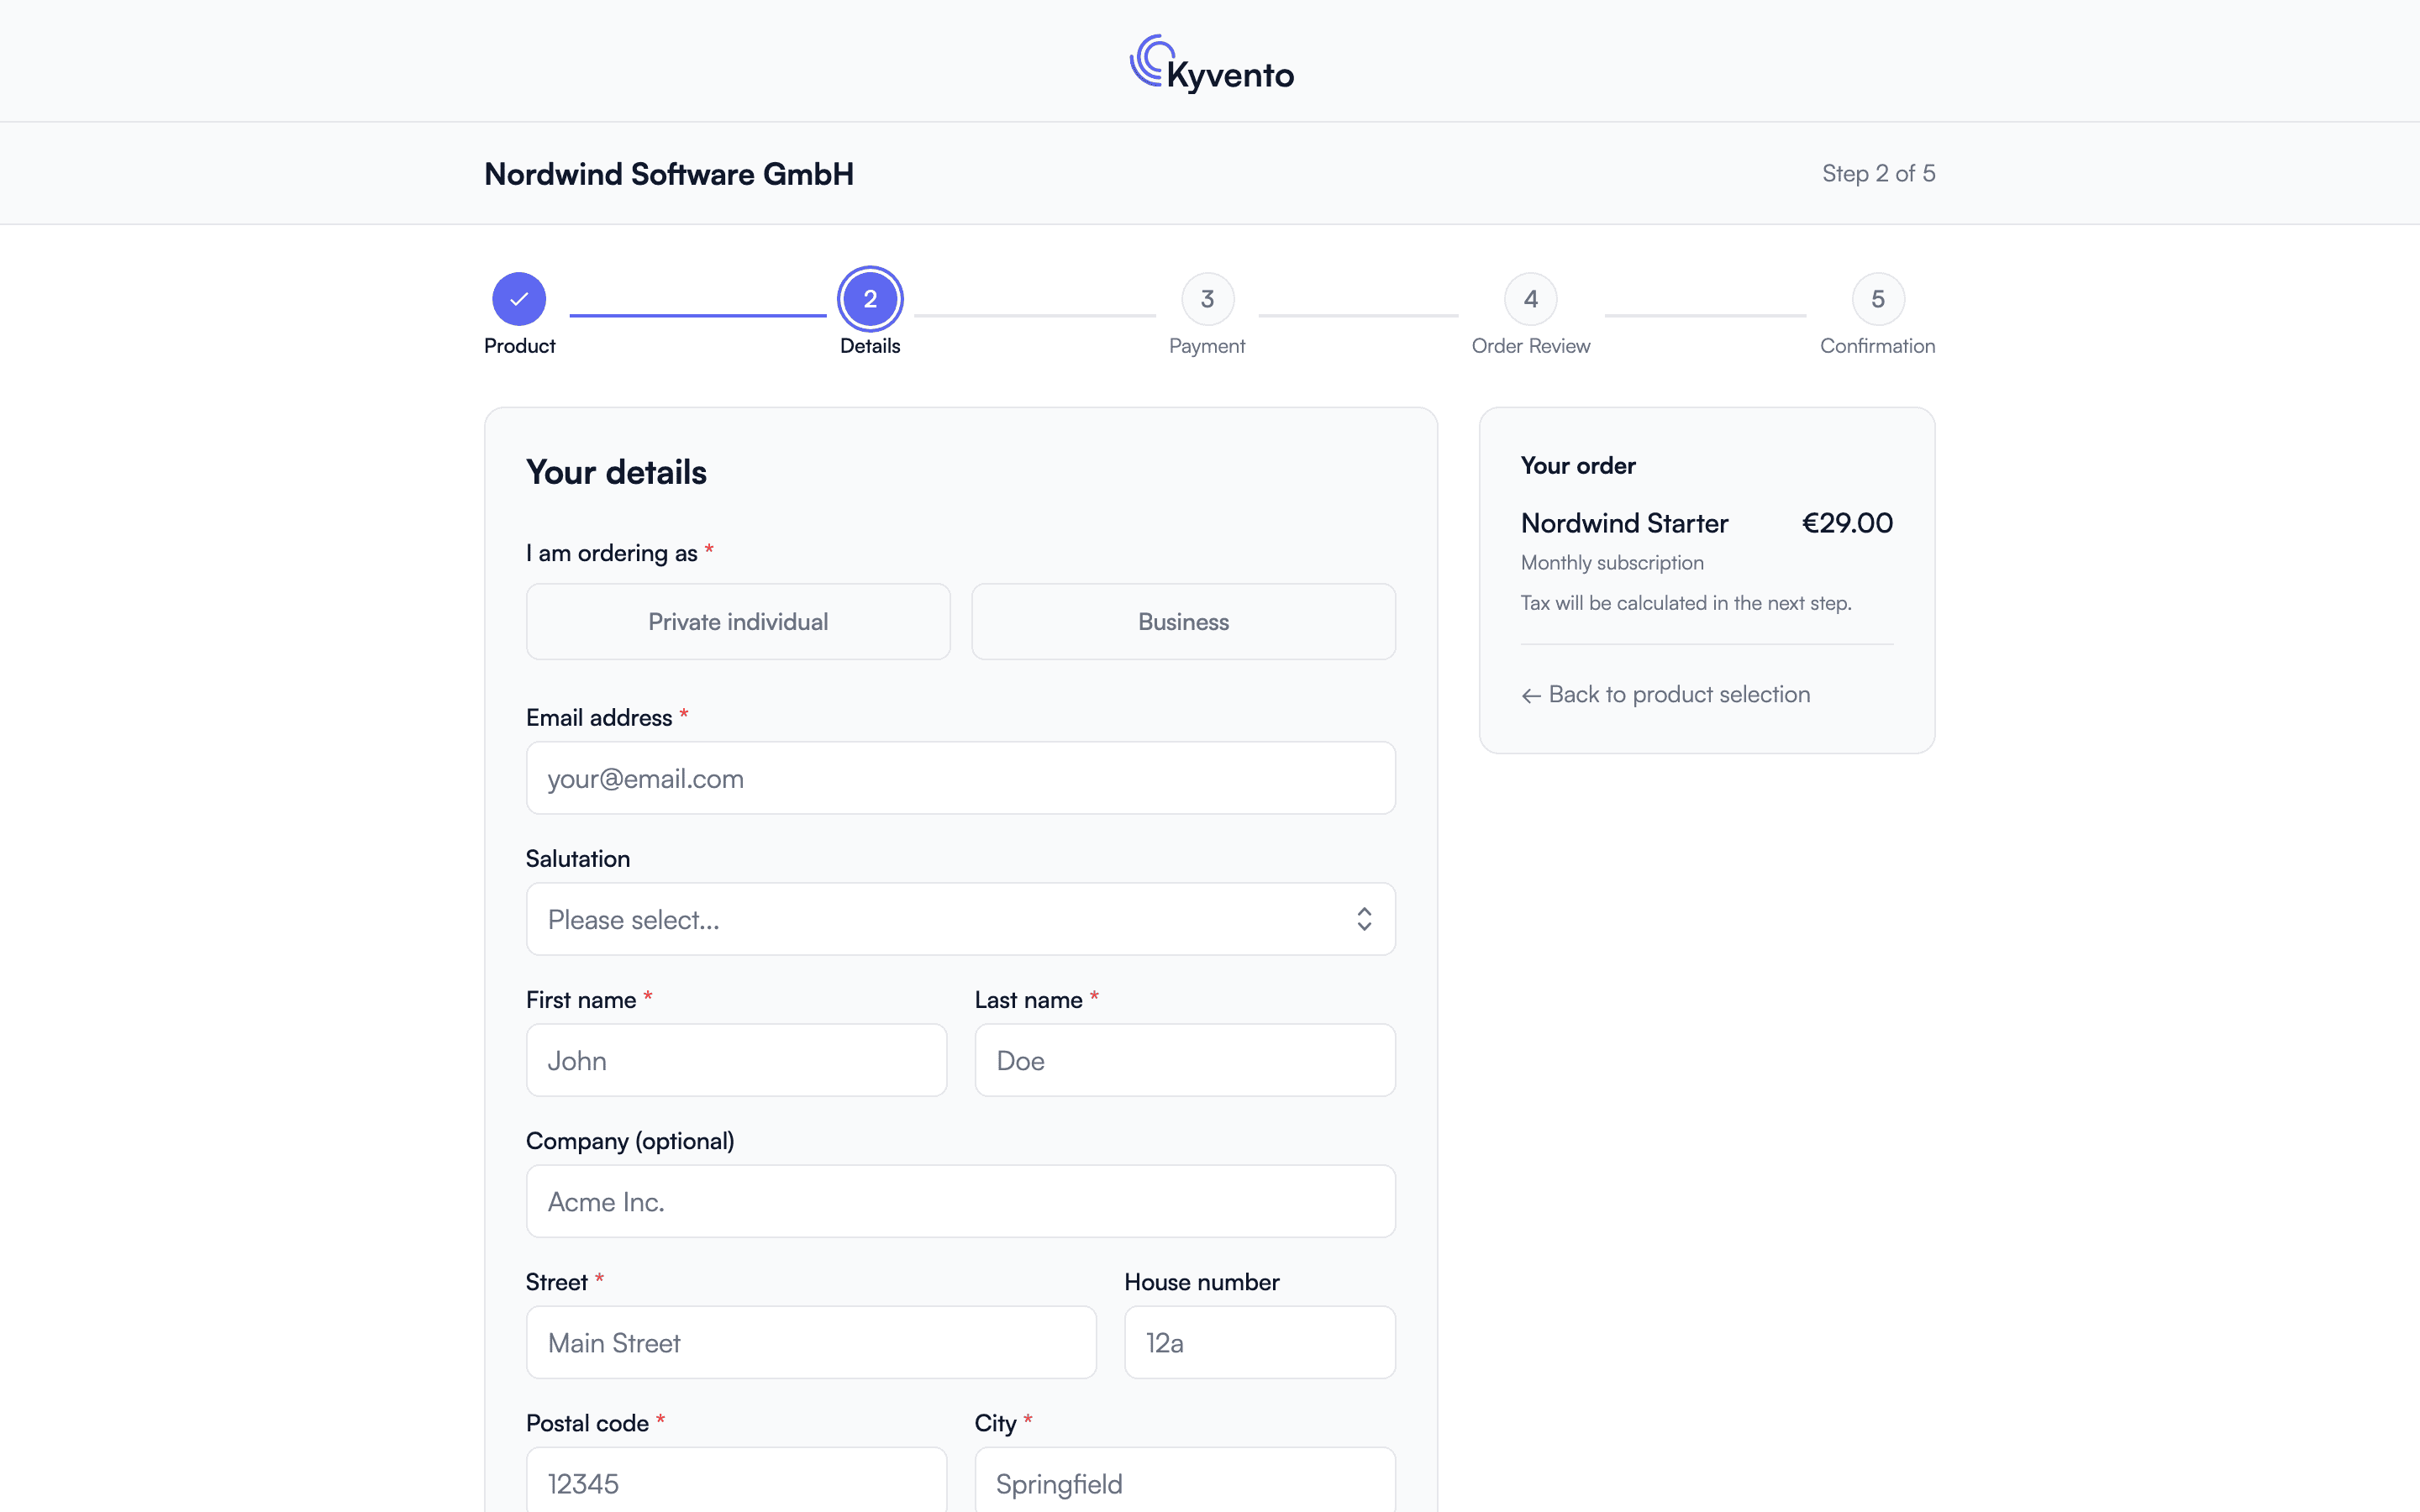
One intermediate step can appear: if the buyer enters an email address that already has a customer account, Kyvento sends a confirmation link to that address and waits for it to be confirmed. It looks like a hurdle, but it prevents someone ordering under another person's address and stops a second record being created for the same customer.
Levers for more conversions
- Trim the form fields – with one exception, see below. Ask for what you genuinely need for the contract and the invoice.
- Limit customer types: if you only sell to businesses, switch off the private-customer route under "Sell to" – that spares the buyer the choice in the first step.
- Offer payment methods broadly: every additional relevant payment method lowers the drop-off in the payment step.
- Use trials: for trial products the checkout shows 0 and explicitly states the length of the trial and the amount of the first invoice. That is a strong argument – advertise it outside the checkout too.
- Use coupons deliberately: the coupon field is always there. Communicate codes in campaigns instead of building permanent discounts into the price (see Creating and managing discount codes).
- Let existing customers buy again: the customer portal settings offer self-service booking – logged-in customers then book further subscriptions with their stored data, without any checkout form. It requires a saved payment method and a configured Terms URL.
The field you should not remove
If you hide the VAT ID field, EU business customers can no longer provide it – and are charged German VAT instead of reverse charge. For the customer that is a real price increase; for you it is an invoicing error that nobody notices in the checkout. If you sell to businesses elsewhere in the EU, leave this field in place.
The field selection also reaches in a second direction: it governs the profile in the customer portal as well (see Setting up hosted pages).
What you cannot measure
Views and drop-off rates per checkout step are not available to you in Kyvento. If you want to analyse the funnel, measure it with your own analytics tool and the redirect URLs – see Conversion tracking and analytics.
After the purchase
On completing the order, Kyvento creates the customer, the subscription and – depending on the product – the first invoice automatically; the customer receives their documents by email. With the redirect URLs for success, cancellation and error you then bring them back to a page of your own, such as an onboarding or thank-you page.
Recommended quality check
- Walk through the complete checkout yourself regularly – on a phone, not just on a desktop.
- After product or price changes, check the checkout's product page: description, tax display, interval.
- Keep the legal texts current – the linked Terms and privacy URLs always point at your live documents.
Next steps
- Measure purchase success – see Conversion tracking and analytics
- Basic checkout settings – see Setting up hosted pages