Setting up API access and creating an API key
Overview
Through the REST API, external applications access your Kyvento data – from your own script to an ERP integration. Access runs through API tokens, which you create in seconds and grant granular permissions. This article shows the setup and the most important security rules.
Creating a token
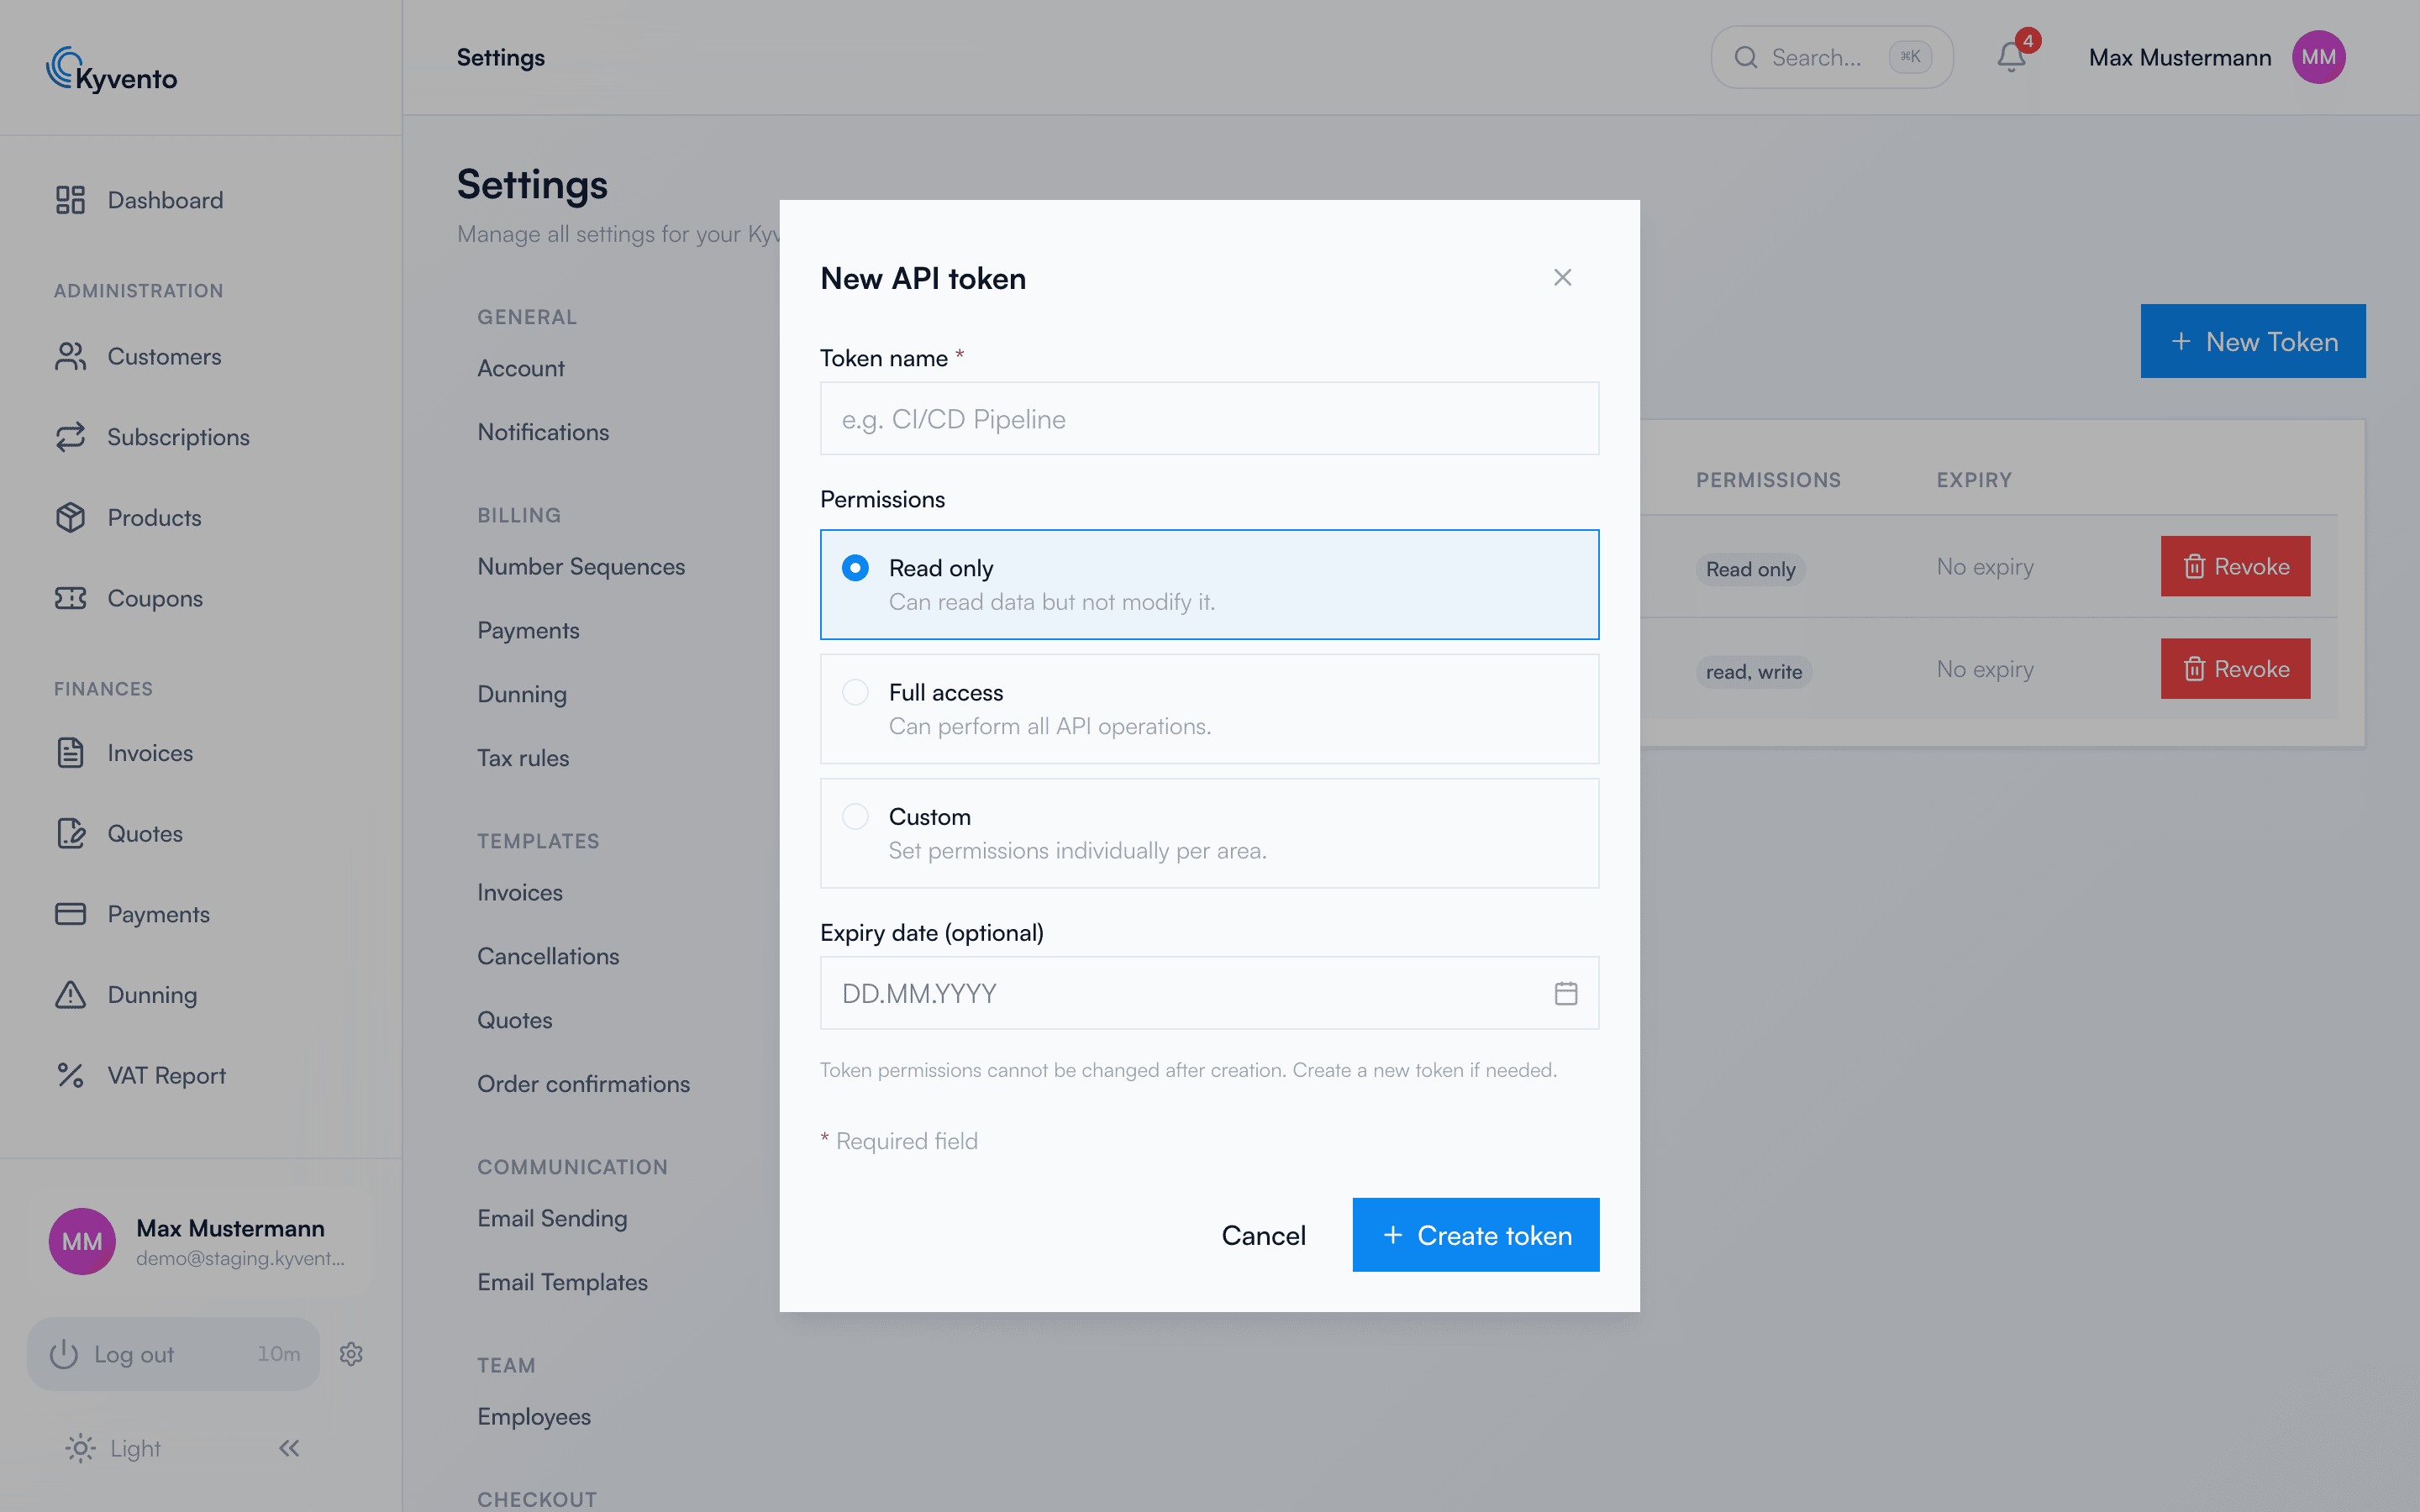
Open Settings → "API Tokens" (the "Integration" group) and click "New Token". In the dialog, you define:
- Token name: a descriptive label, such as "ERP sync" – so you can later tell which token runs for what.
- Permissions: "Read Only", "Full access" or "Custom" – with the latter, you choose between "No access", "Read" and "Full access" for each area individually (customers, subscriptions, invoices, …). The "API Access" area is not available for tokens (a note below the table says so), nor is GDPR anonymization.
- Expiry date (optional): the token expires automatically on the chosen date.
Important: The permissions can no longer be changed after creation – for changed requirements, create a new token. A token can also never do more than your own user role allows.
The token is shown only once
After creation, Kyvento shows the token only once in plain text – copy it immediately into your password manager or your application's secret management. After that, for security reasons it can no longer be retrieved; if you lose it, simply revoke it and create a new one.
Using the token
Every API call sends the token as a Bearer header:
Authorization: Bearer YOUR_TOKEN
There are two peculiarities you should be aware of: API responses to token requests are always in English (stable, machine-readable strings), and tokens reach only the documented public API – Kyvento answers token requests to internal web-interface endpoints with an error message. What is documented can be found in the article API documentation and examples.
Managing and revoking tokens
The token list shows your own tokens (up to 100) – tokens that have already expired remain listed too; tokens of other team members do not appear. Revoking makes a token invalid immediately – from then on, the affected application receives authentication errors.
Security recommendations
- One token per integration – so you can revoke selectively without disrupting other integrations.
- Principle of least privilege: read-only access wherever writing isn't needed; custom permissions instead of full access.
- Set an expiry date – especially for test and project tokens.
- Never embed tokens in code repositories or client applications – they belong in server environment variables.
Next steps
- Endpoints and examples – see API documentation and examples
- Push instead of polling – see Configuring webhooks