Inviting team members and managing permissions
Overview
Bring your team on board: under "Settings" → the "Team" group → "Employees" you invite colleagues and use roles to control what each person can access.
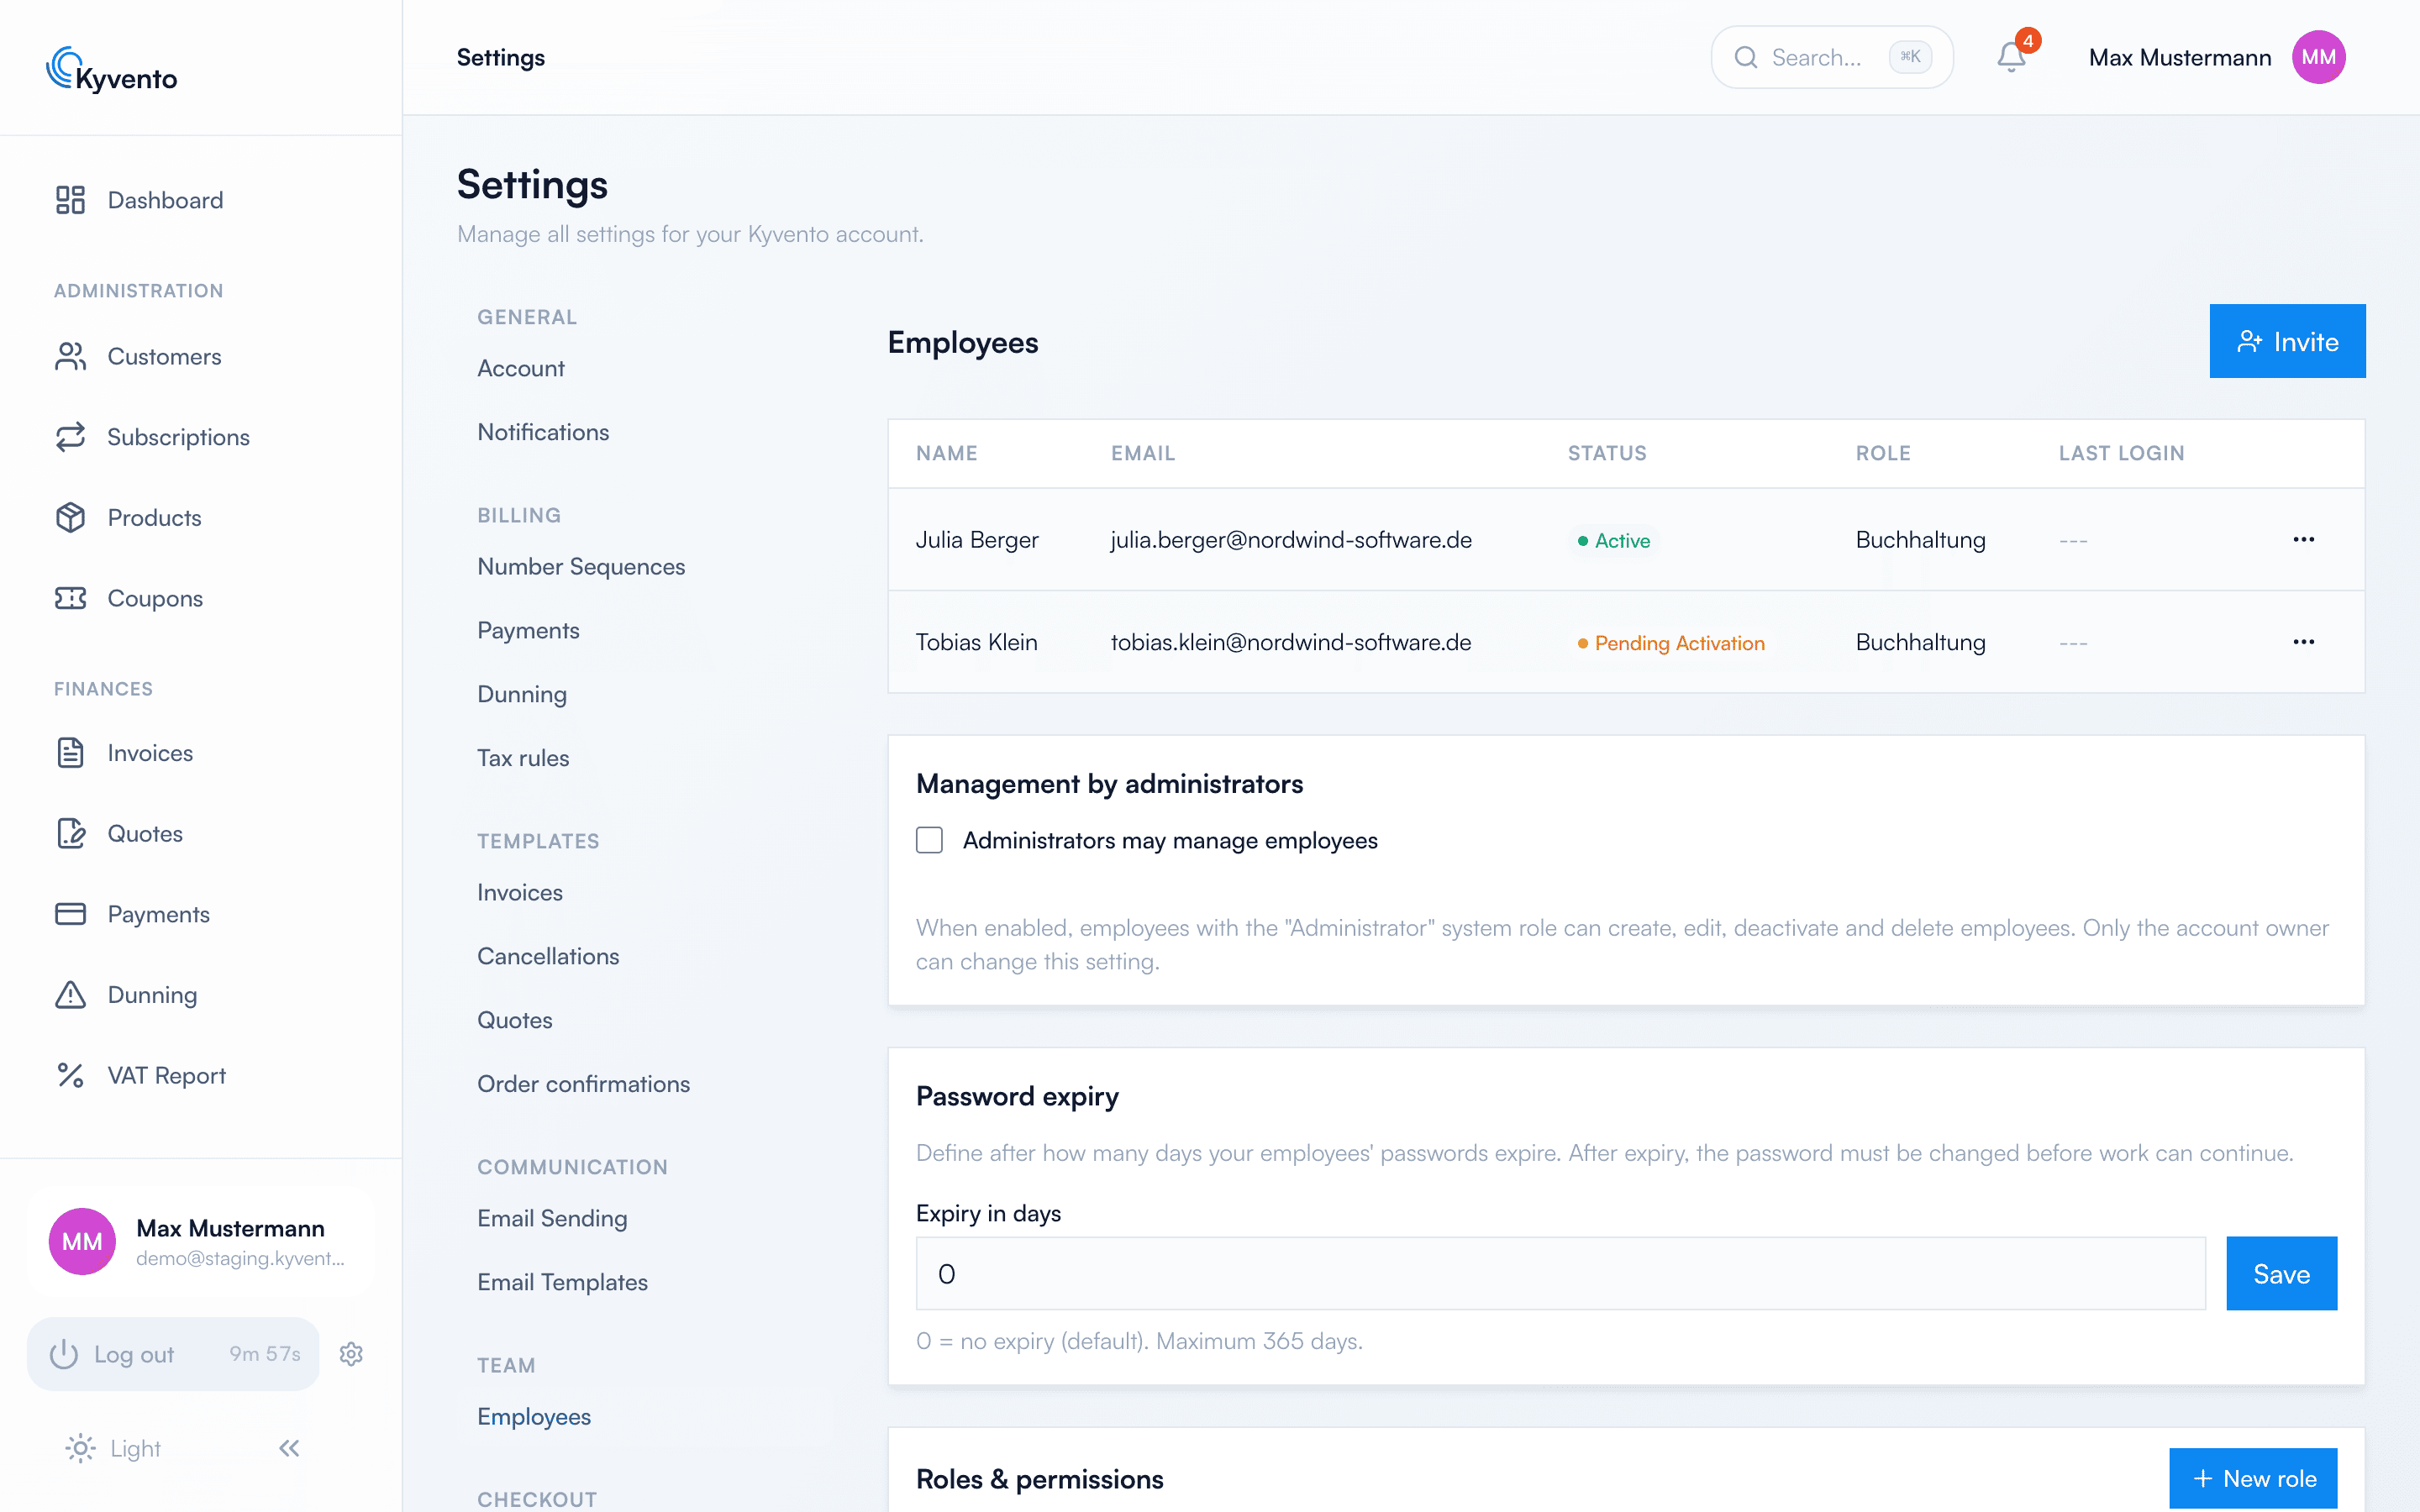
Invite an employee
Via "Invite" you enter the name, email address and role and send the invitation. The person receives an activation email and sets their own password; until then they show as "Pending". The activation link is valid for 7 days — after that, simply send the email again.
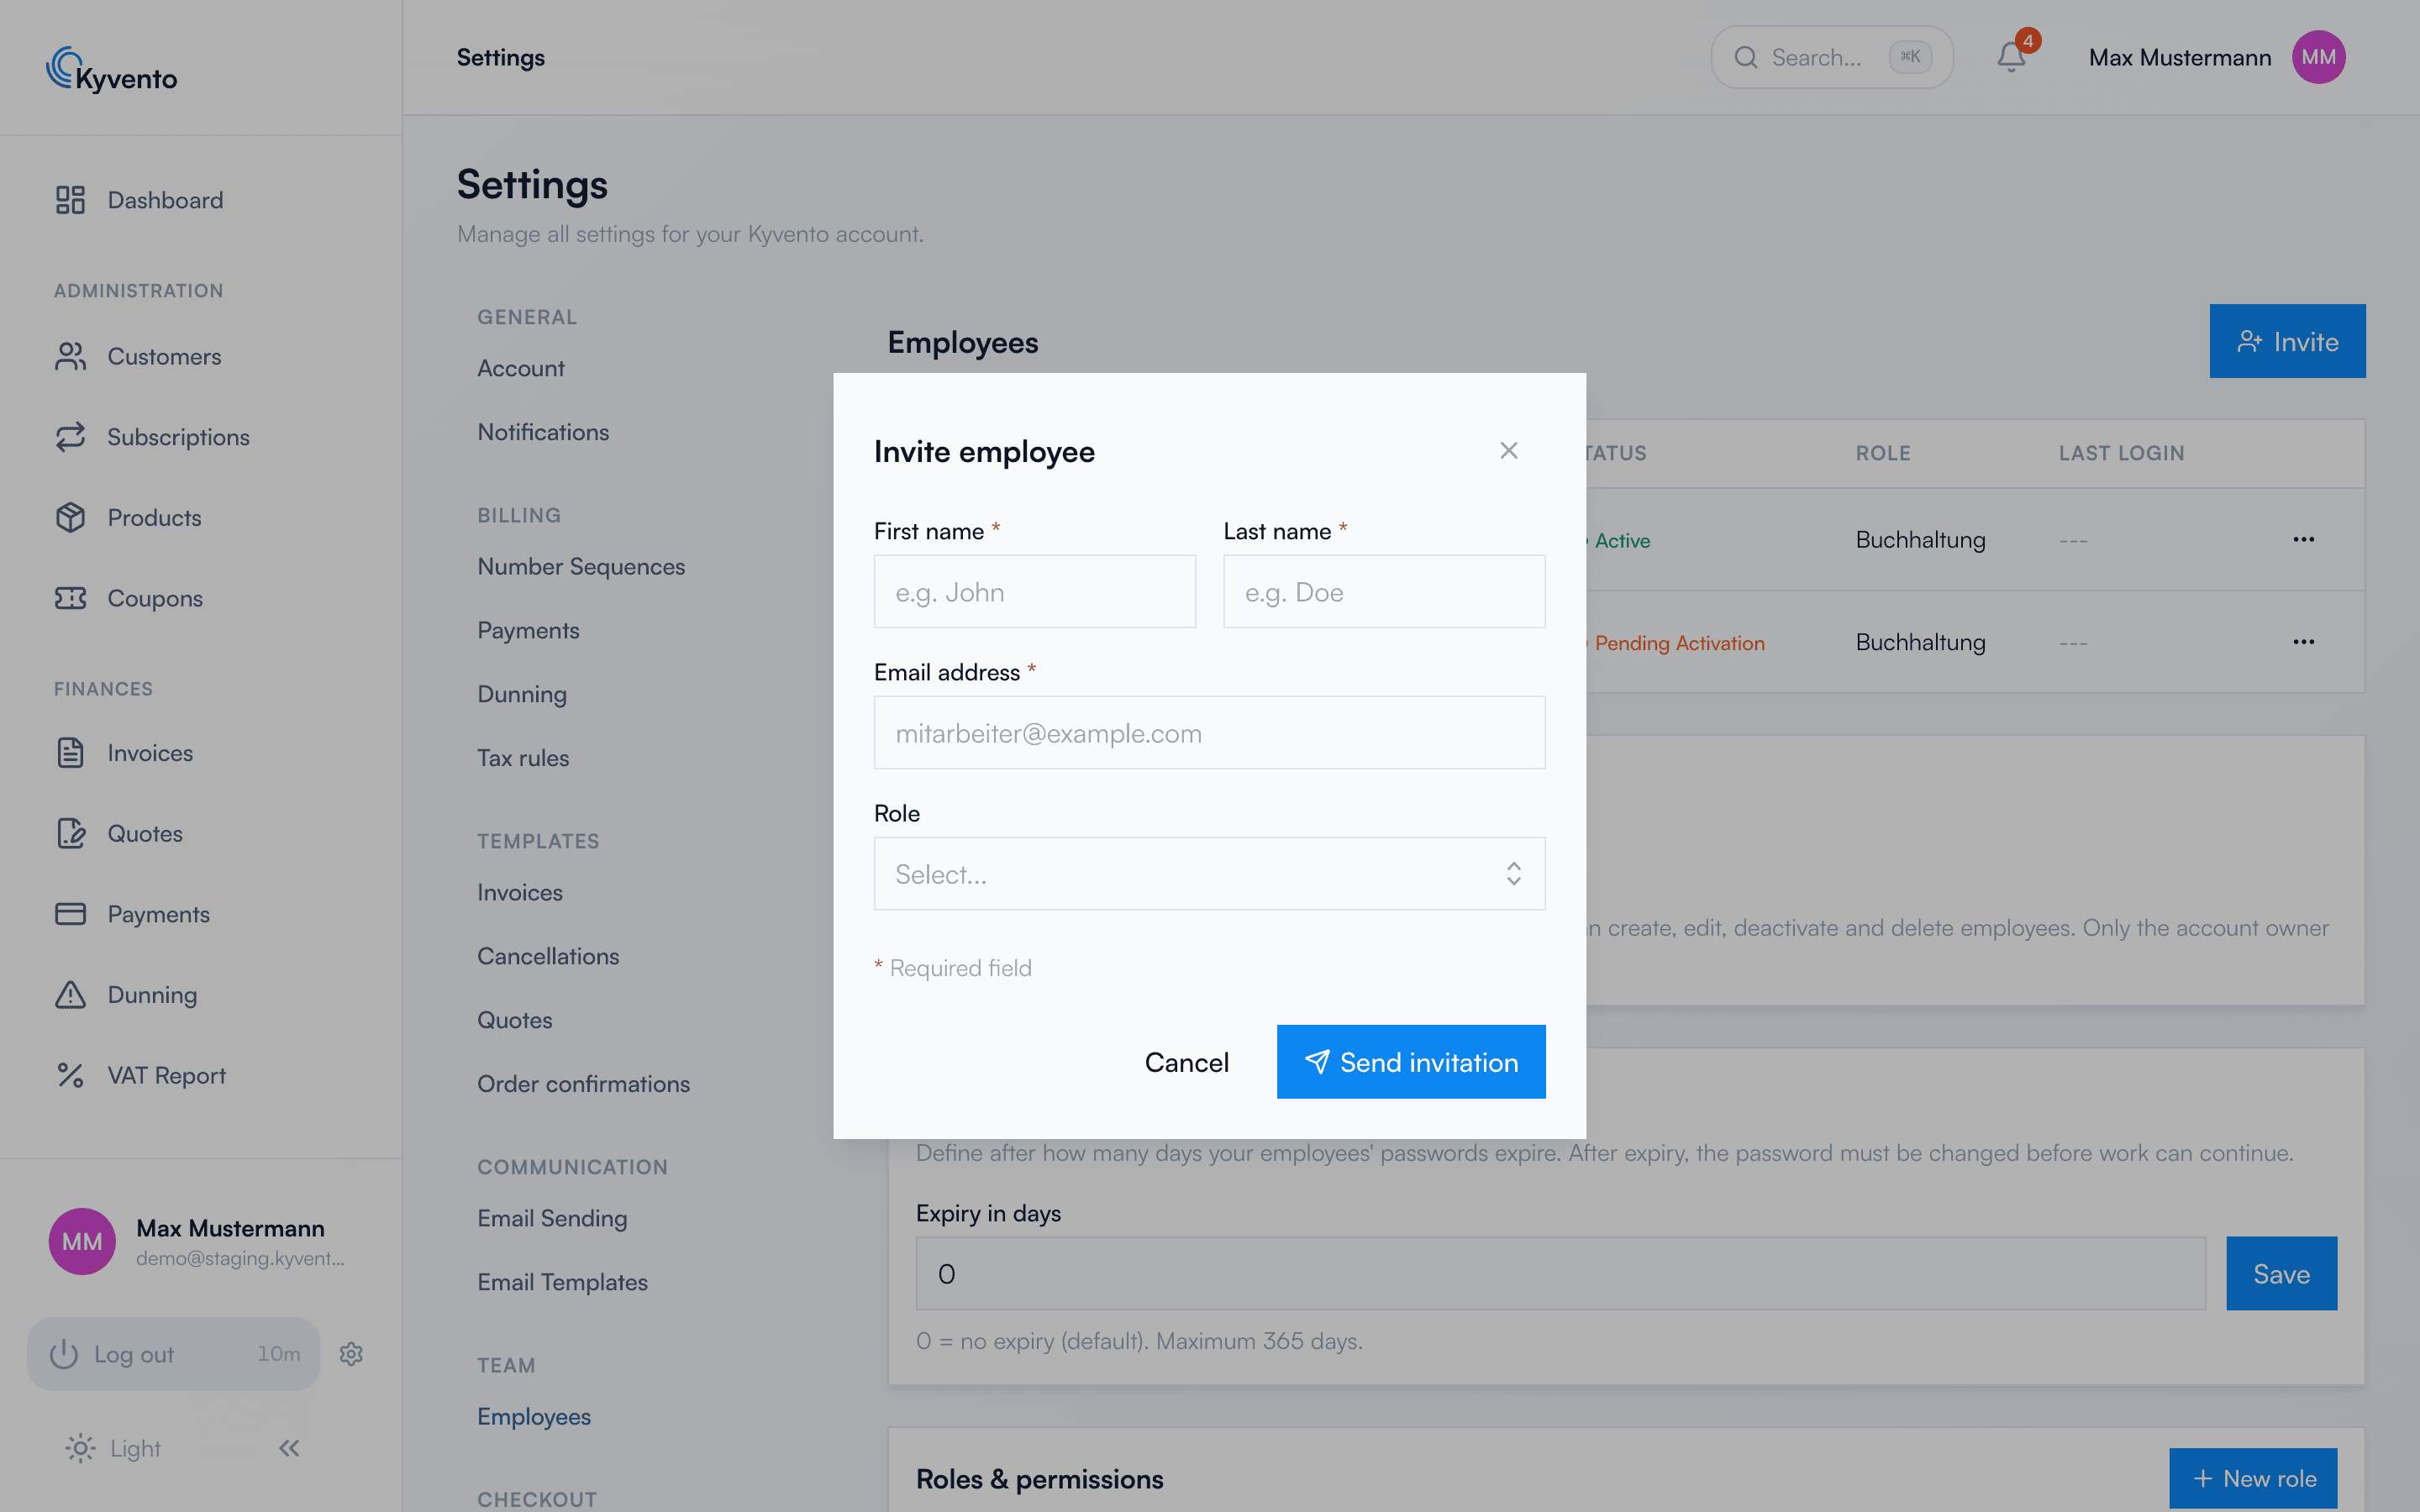
The roles
Kyvento comes with six roles that differ in their focus:
- Administrator — full access to almost all areas
- Full access — operationally like an administrator, without the internal areas
- Employee — day-to-day work around customers, invoices and subscriptions
- Accountant — finance focus: billing, dunning, payments, tax rules
- Support — customer contact, with read access to financial data
- Read only — view without changes
Which areas a role opens up in detail is shown by the "Roles & permissions" list on the same page — that is where the complete and always current matrix lives. If none of the six fits, create your own as the account owner via "New role" and choose between "No access", "Read" and "Full access" for each area.
Two limits that cannot be moved
- Employee management can never be delegated to a custom role. It stays with the account owner — and, if you enable the option "Administrators may manage employees", additionally with administrators. Only the account owner can change this option.
- The account owner cannot be modified by anyone.
How many seats your plan includes
Every plan comes with a fixed number of user seats; the employee page shows above the list how many of them are taken. Every active account counts — including your own as account owner — as does every invitation still outstanding. Deactivated employees do not take up a seat.
Once all seats are taken, nobody else can be invited. You then have two options: deactivate an account that is no longer needed — or move up to the next larger plan. How many seats the individual plans include is stated on the pricing page and in your billing area.
When downgrading your plan
A downgrade is rejected as long as more users are active than the target plan allows; the message names both numbers. Deactivate the surplus accounts first. This is deliberate — otherwise employees would be locked out without warning when the plan changes.
Once the change goes through, the smaller limit applies immediately — not only at the end of the period, when the downgrade takes effect financially. Accounts already created remain; new invitations and the reactivation of deactivated employees, however, follow the target plan from that moment on. That is why the downgrade confirmation requires an explicit checkbox for this.
Password expiry
Under "More settings" you define after how many days your employees' passwords expire; after expiry the password must be changed before work can continue. The default is 0 — no expiry. Only set a value if your security policy requires it: an expired password holds the employee up until they have set a new one.
Deactivate or delete an employee
Via the menu next to each employee, accounts can be deactivated (login blocked, data retained) or deleted at any time.
Next steps
- Secure your team's accounts — see Enabling two-factor authentication