Creating a plan: step by step
Overview
This article walks you through the stations of the product form — from the mandatory details via terms to cancellation and withdrawal.
Step 1: Create the product
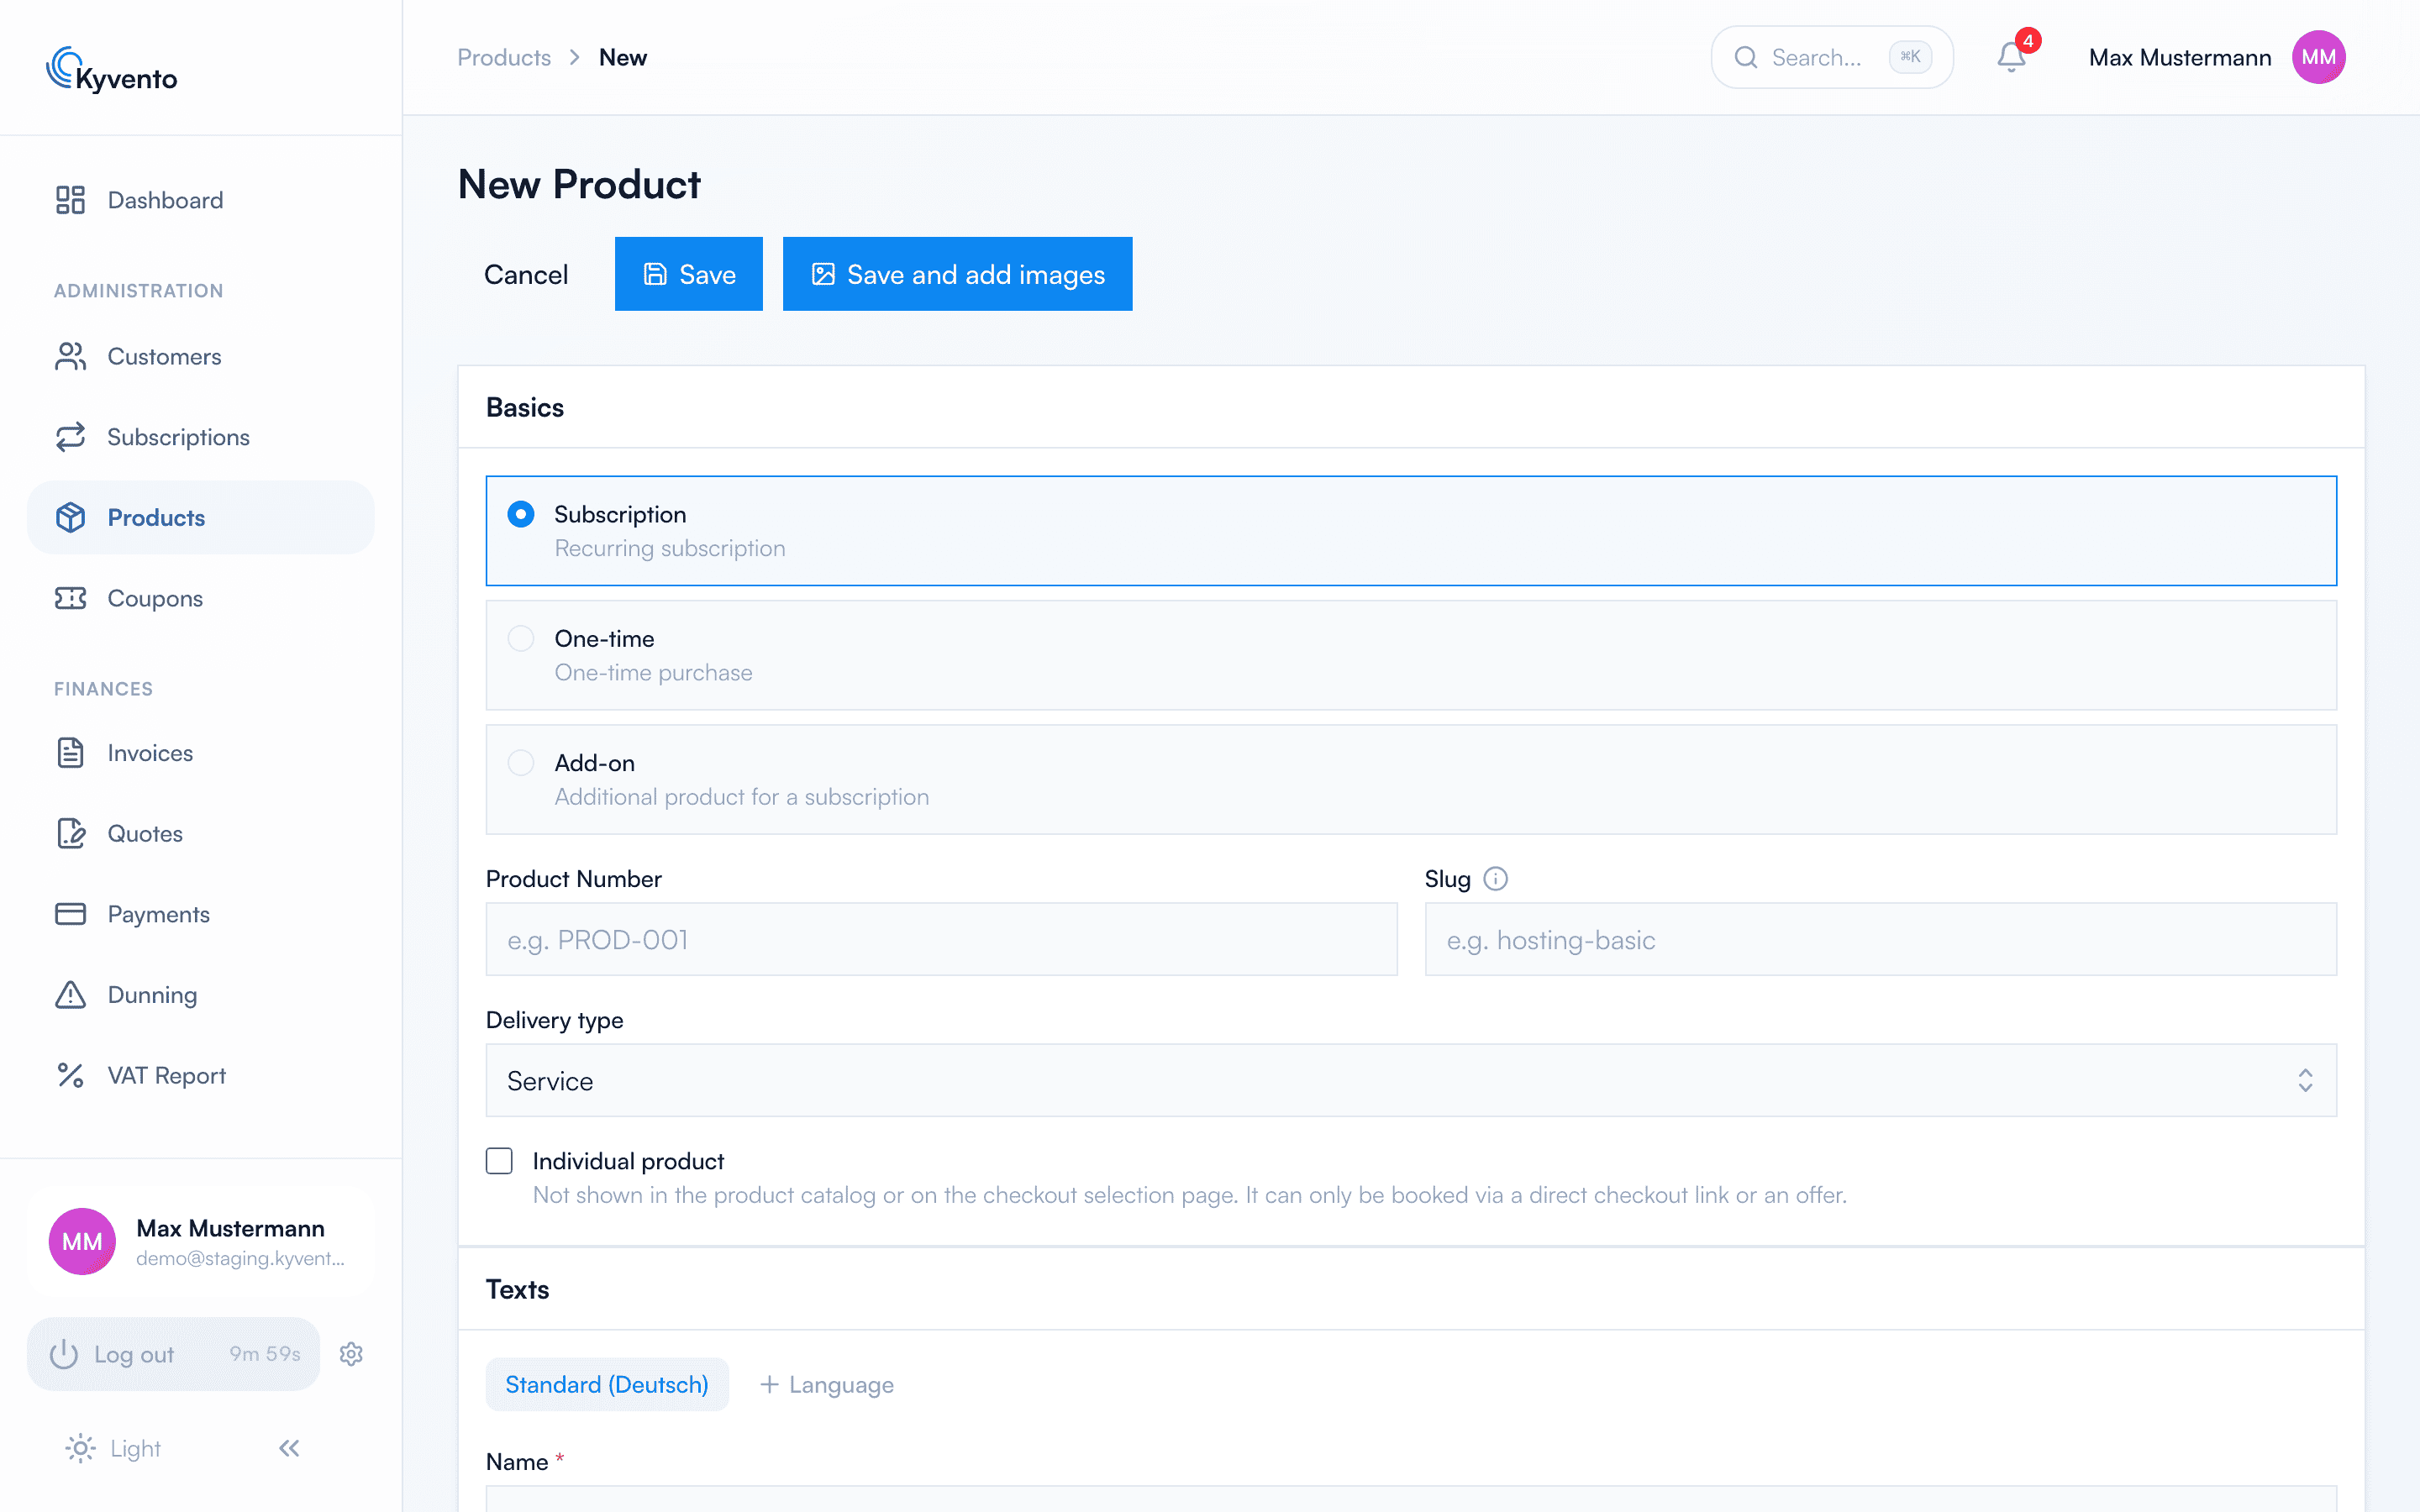
Open "Products" → "New Product" and choose the type "Subscription" in the "Basics" card. That unlocks the cards for the billing cycle and the cancellation conditions. Your first product can only be saved once your account currency has been confirmed – see Maintaining company and tax information.
Required are the name ("Texts" card), the price (net) and the tax category ("Pricing" card) — plus three tax details in the "Basics" card that come with no preset: "Type of supply (for tax purposes)", "Place of supply" and "Catalogue service (§ 3a (4) UStG)". Together they determine which country taxes a sale; without them the product cannot be saved. What lies behind them is explained in Charging VAT correctly.
The description and short description in the "Texts" card appear later at checkout. The sort order in the "Basics" card determines the position in the checkout's product selection — assign the values in steps of ten and you can later slide a product in between without touching all the others.
Step 2: Quantities and bookability
The "Quantity & Booking" card defines the quantities in which your product can be ordered. Only "Allow multiple" permits quantities greater than 1 and unlocks the fields for minimum and maximum order quantity; without it, the booking quantity is fixed at 1. For the quantity-based pricing models (per unit, tiered, volume-based) it is mandatory and therefore locked.
An empty maximum order quantity means unlimited. A maximum below the minimum is rejected on save — the check lives in the backend and therefore applies to changes made via the API as well.
Step 3: Set the billing cycle
The "Billing Cycle" card only appears for the type "Subscription":
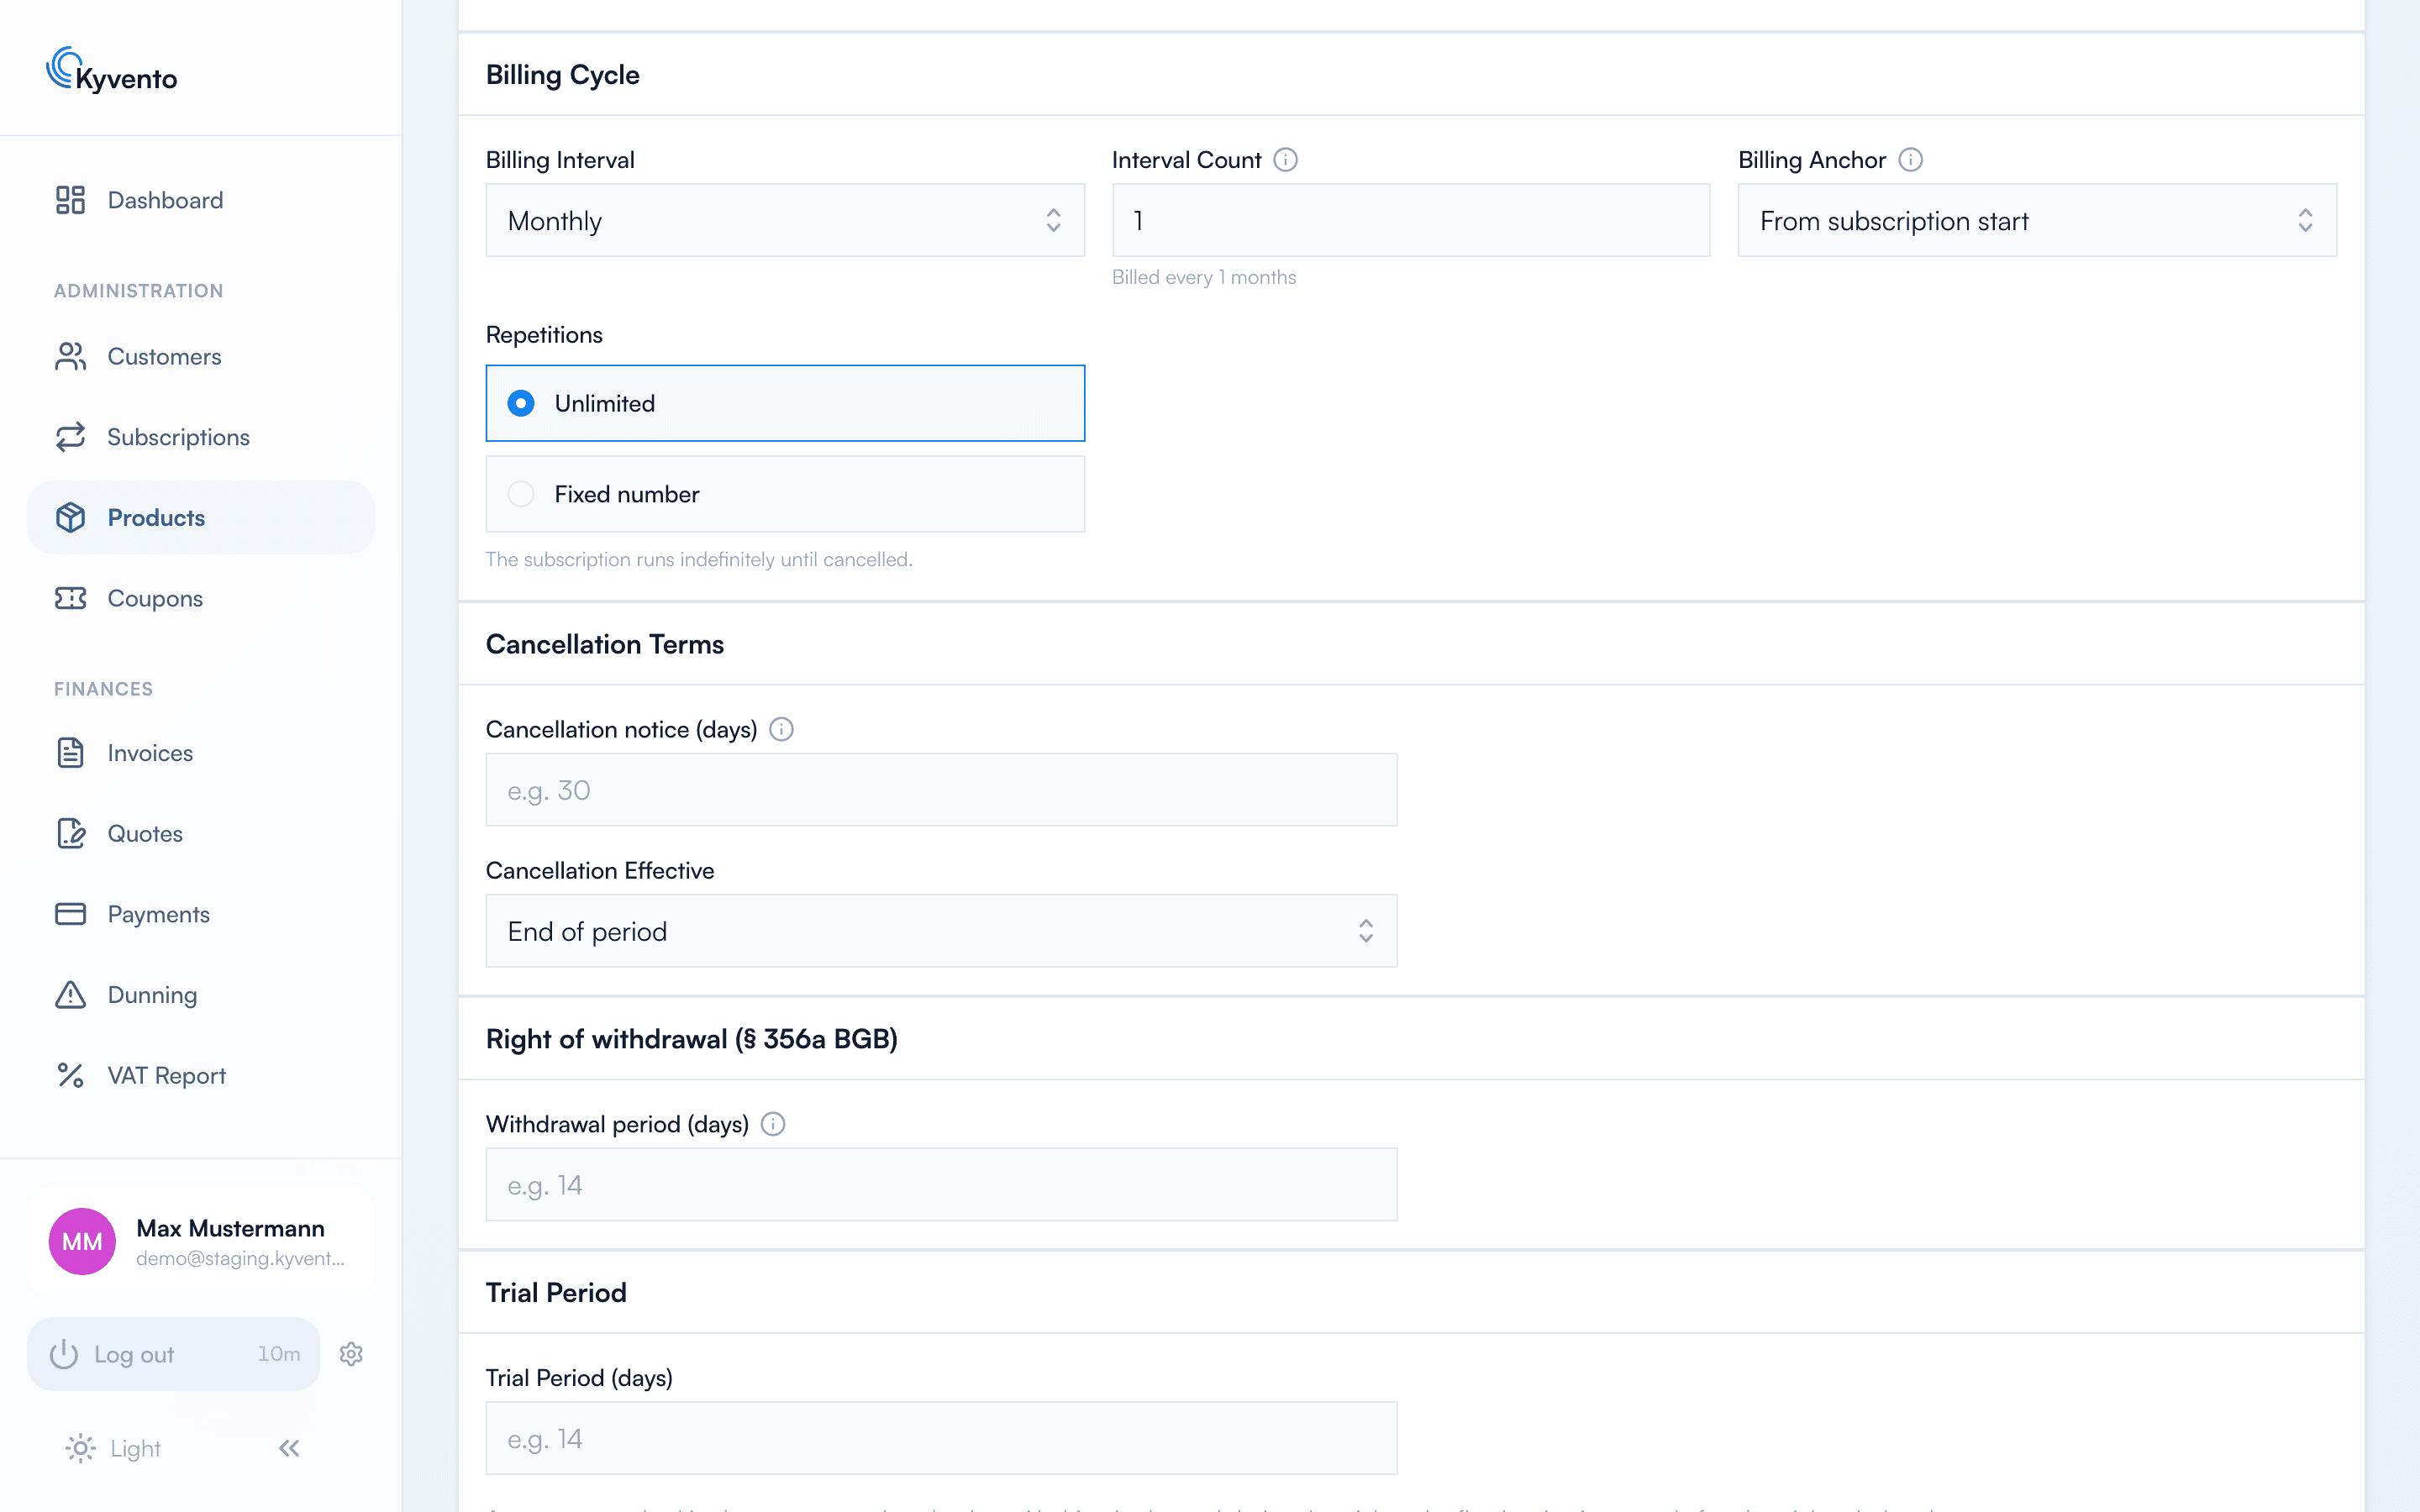
- Billing interval — daily, weekly, monthly, quarterly, half-yearly or yearly.
- Interval Count — a multiplier for special rhythms: "Yearly" with an interval count of 2 produces billing every two years. The hint text shows the result live.
- Billing Anchor — the date on which each period starts: "From subscription start" uses the booking date, "Start of month" the 1st, "Start of year" January 1st, and "Fixed calendar day" puts every subscription on the same day of the month. Only anchors that match the interval can be selected — "Start of year", for instance, requires yearly billing. How the anchor affects the first, pro-rata period and later adjustments is covered in Billing cycles and key dates.
- Repetitions — "Unlimited" runs until cancellation; with "Fixed number" the subscription ends automatically after the last period with the status "Expired", without another invoice.
Step 4: Cancellation conditions
- Notice period (days) – applies to all buyers of the product. For periods longer than 30 days, Kyvento points out the legal situation regarding terms and conditions (Section 309(9) of the German Civil Code (BGB)).
- Cancellation effective – "At the end of the period" or "Immediately". As soon as a notice period is set, "At the end of the period" applies automatically.
Step 5: Right of withdrawal (Section 356a of the German Civil Code (BGB))
For consumer contracts, enable the Withdrawal period (days) here. In the customer portal, the customer then gets a dedicated withdrawal button (separate from cancellation). You can configure the refund (100% or pro rata), the automatic reversal via the payment provider, and immediate suspension of the subscription upon withdrawal.
Step 6: Save and test
After saving, the plan is immediately bookable – via its checkout link, which you open on the product page through "More actions" → "Checkout", or directly for a customer through "More actions" → "Add subscription".
Later changes do not apply retroactively. When a subscription starts, its pricing is frozen – for usage-based models with the first usage record. If you change the product's price or terms afterwards, that applies to new bookings; running subscriptions keep what applied when they were concluded. As soon as at least one subscription runs on the product – paused ones included – the edit dialog points this out. To move existing contracts, go through the individual subscription instead, see Handling upgrades and downgrades.
Next steps
- Quantity- and usage-based pricing – see Pricing models: monthly, yearly, usage-based
- One-off setup fees – see Adding setup fees