Configuring webhooks
Overview
Webhooks reverse the flow of information: instead of having your systems ask for changes at regular intervals, Kyvento reports events – new subscriptions, paid invoices, failed payments – immediately via HTTP POST to your URL. This article shows the setup, event selection and signature verification.
Creating an endpoint
Open Settings → "Webhooks" (the "Integration" group) and click "+ New endpoint":
- "Name (optional)": for example "ERP integration" – to recognize it in the list.
- "Endpoint URL": the HTTPS address of your receiver. Kyvento rejects private and internal network addresses for security reasons.
- "Authentication & headers (optional)": if needed, basic-auth credentials and your own HTTP headers, which Kyvento sends along with every delivery.
- "Events": the event types this endpoint should receive, via checkbox – or "Select all".
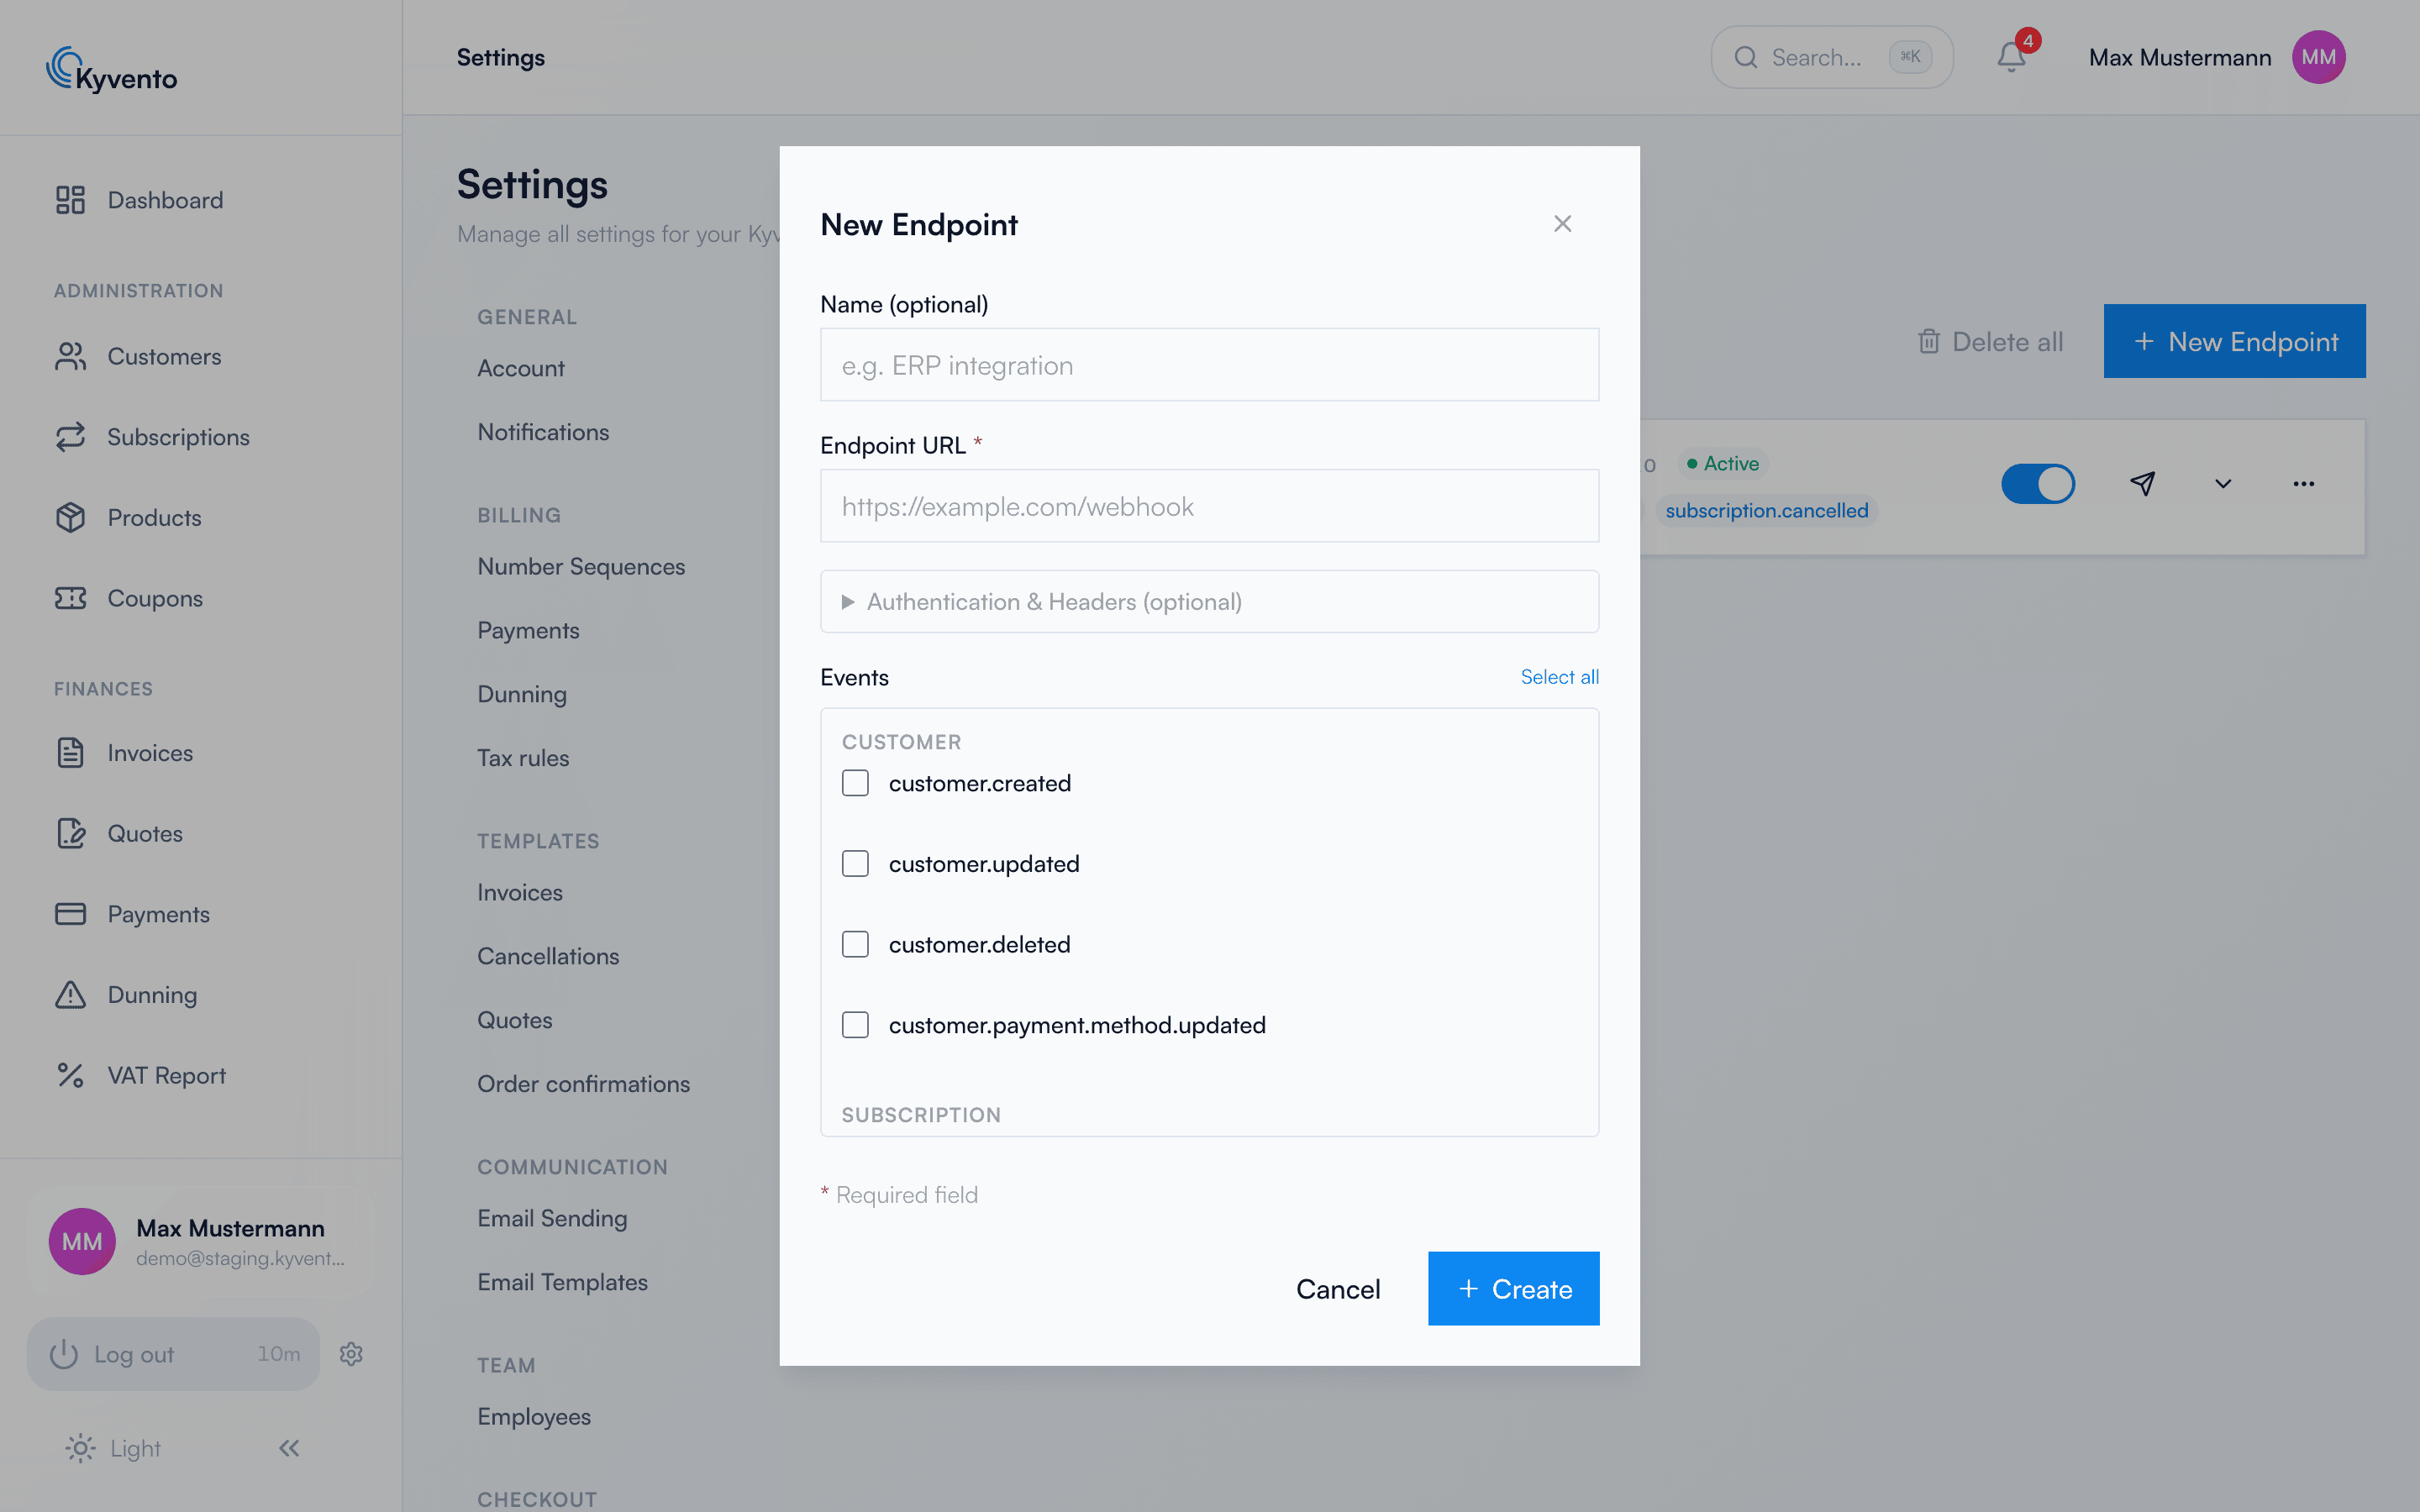
After creation, Kyvento shows the signing secret (prefix whsec_) only once – store it securely in your receiver application, you need it for signature verification.
Verifying the endpoint
Before events start to flow, it has to be proven that the address entered is yours: Kyvento sends a check value to the URL once, and your server must return it unchanged with status 200. As long as this proof is missing, the endpoint carries the "Not verified" badge and receives no deliveries – not even when it is active. After every change to the endpoint URL the proof has to be provided again. The full procedure with an example delivery and example response is described in Verifying a webhook endpoint.
The most important event groups
- customer.* – customer created, updated, deleted, payment method updated
- subscription.* – subscription created, renewed, paused, cancelled, trial converted or ending soon, plan changed
- invoice.* – invoice finalized, paid, partially paid, overdue, cancelled
- payment.* – payment succeeded, failed, refunded, direct debit returned
- dunning.* – dunning level escalated, dunning paused/resumed
- test.ping – for connection tests
Structure of a delivery
Every delivery is a JSON POST with a stable envelope: id (event ID), type, created, account_id, data.object (the affected object) and, for changes, previous_attributes. It comes with the headers X-Kyvento-Event (type), X-Kyvento-Delivery-Id (unique per delivery – on retries of the same delivery the ID stays the same, so your receiver can detect duplicates by it; the attempt counter runs separately) and the signature.
Verifying the signature (strongly recommended)
The header X-Kyvento-Signature has the form t=<timestamp>,v1=<signature>. The signature is an HMAC-SHA256 over the string timestamp.request-body with your signing secret as the key. Check both: signature correct and timestamp no older than 5 minutes – this way you reject forged and replayed deliveries.
Testing the connection
The "Send test" action immediately sends a sample event to your URL – ideal for checking reachability and processing before real events flow. The test delivery takes the same path as a genuine one and therefore carries the same signature – so you can test your signature verification with it directly. You can recognise it by the additional header X-Kyvento-Test: 1 and the test field in the body; it does not appear in the delivery history.
Next steps
- Prove control over the endpoint address – see Verifying a webhook endpoint
- Delivery retries and error diagnosis – see Webhook retry and error handling
- Interplay with the REST API – see API documentation and examples